What I learned about repair by disassembling my iMac


While working on the Die Gute Fabrik report last month, I needed to open some very large spreadsheets. Both the US EEIO model of spend-data emissions factors and the European EXIOBASE model have huge datasets – one single EXIOBASE sheet can be over 700 MB and a whole dataset can be multiple gigabytes.
Trying to do any sort of operation on a file that big – like copying and pasting from one sheet to another –when you have a machine with only 8 GB of RAM is an exercise in trust in the stability of the operating system. At one point, I pressed ‘paste’ and walked away from the machine for five minutes hoping it would keep on doing its thing, while it showed only the spinning beachball of doom. Clearly, we were struggling well beyond its intended capacity… but the weird thing is, this machine has struggled from the moment it left the box.
I got my iMac second-hand from a friend who bought it from Apple and immediately had many of the same problems. My mate is a marine biologist and tropical fish enthusiast, and he just wanted to be able to do some simple processing in Photoshop. But the iMac he bought brand new in early 2020 – a 2019 Intel 21.5” model – came with a sluggish spinning plate hard drive and only 8GB of RAM. From the moment he bought it, the machine struggled with the most basic of tasks. It came from the factor instantly obsolete.
Why would a company sell a product that is basically not up to the job its sold to do? And why do we put up with it from the richest company on the planet? Another friend, an IT professional who works with corporate clients to make their hardware work as intended, described base-line iMac products as “not real products” – they're just at a price-point to entice you before you realise well actually you do need that RAM upgrade and that SSD, and then maybe those extra CPU cores because maybe your kids will want to do some video editing, and before you know it you’ve spent 50-100% more than you planned.
Well, I am sick and tired of this predatory model, which make a mockery of Apple’s own LCA estimates. This particular model “assumes a four-year period for power use by first owners.” My mate didn’t even get 18 months out of his machine before he decided he needed one that actually worked! I am outraged on his behalf, on behalf of anyone else who has been taken in by this, and on behalf of all the resources, power and emissions simply wasted on products designed to be immediately obsolete.
I’ve been using this machine since I bought it off my mate in 2021, and the first thing I did to make it “usable” was by moving the boot drive to an external SSD – this made it functional but hardly a pleasure. I always knew it needed more RAM, but I kept put it off because even though it’s possible to upgrade, it’s an extremely tedious and fraught process – iFixit gives it only a 4/10 for repairability. Having now done it myself, 4/10 seems generous.
One of the biggest hurdles is that the screen is held on by single-use adhesive strips. These have to be cut off to access the insides and then replaced with new ones when reassembled. There’s also some risk of damage to components without using the right tools. What's even more infuriating is that once the screen is off it’s basically a pretty typical computer, if a very compact one. There's nothing that is meaningfully harder to assemble or disassemble than in an equivalent PC. Its just more fiddly. It is an extremely precisely engineered piece of equipment but one designed more with style in mind than maintenance, repair or upgrade.
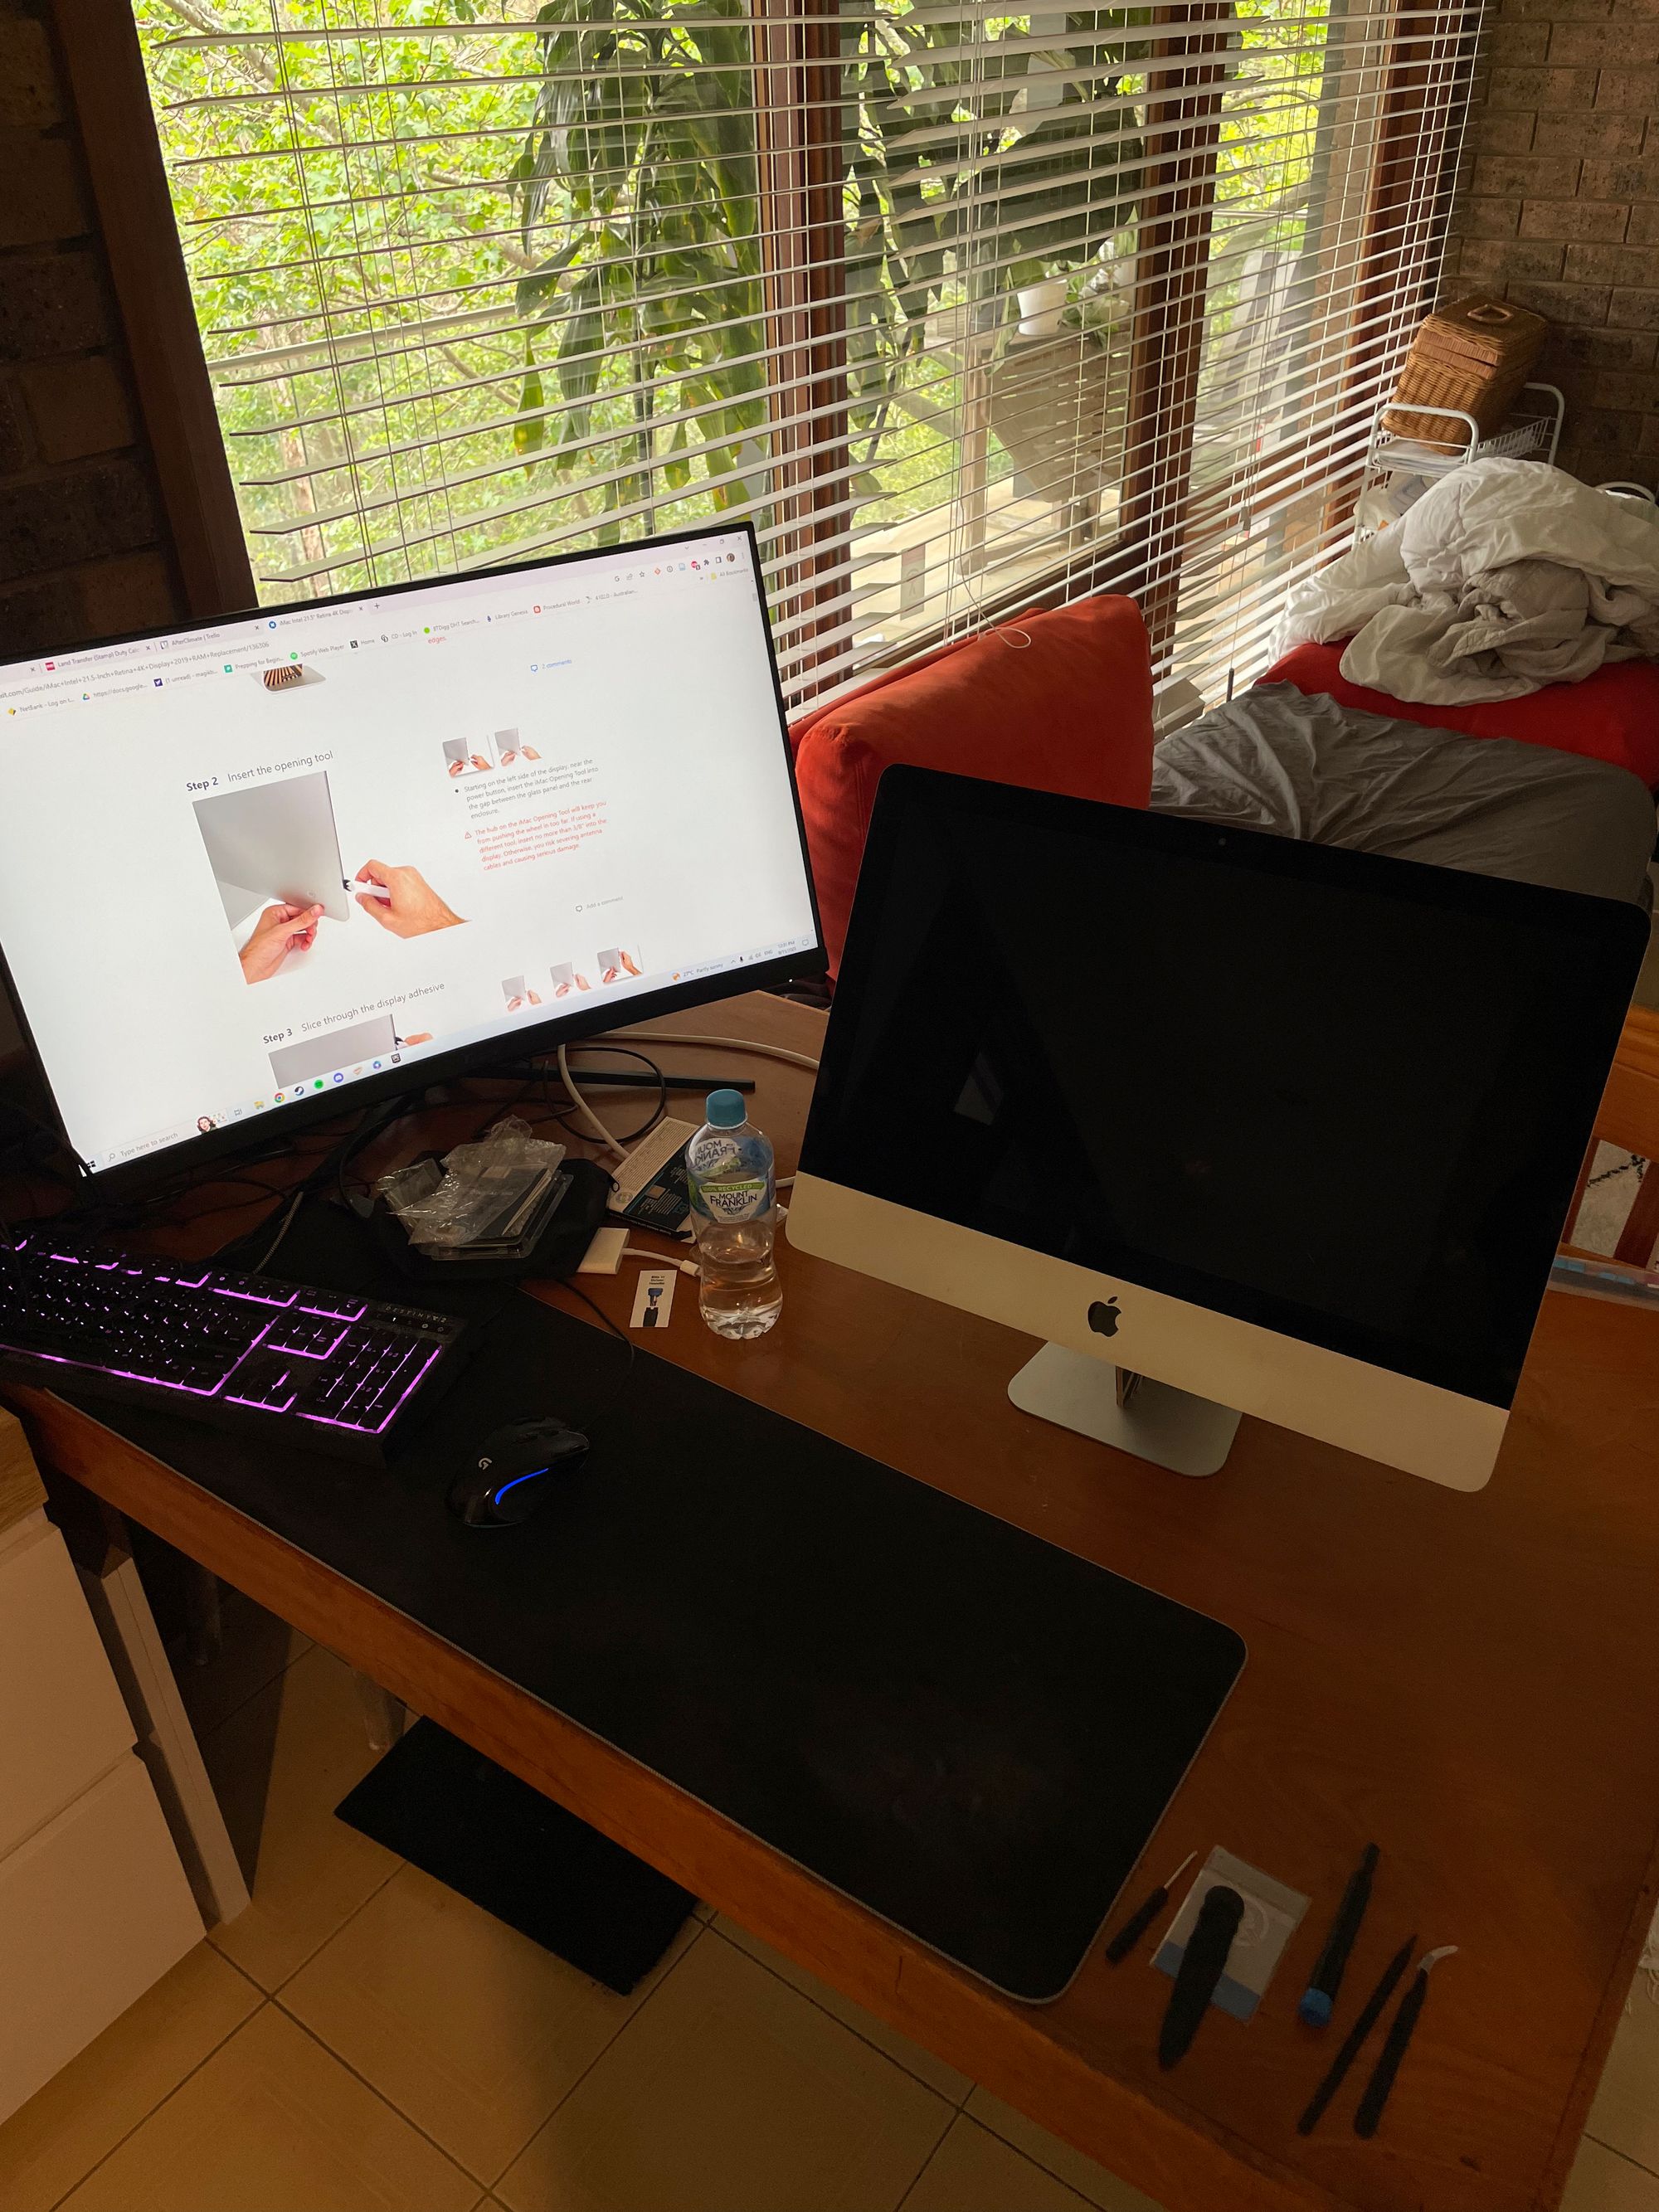
So, to avoid turning this device into eWaste I decided it was time for an upgrade, to see if I could prolong the life of this tragic misfit of a device. Come with me on an illustrated journey of repair, into the guts of an iMac otherwise destined for the great aluminium recycler in the sky. We’re using an iFixit kit which comes with all the tools and a new SSD, and I bought RAM from a local Mac parts supplier – though this caused some complications as we'll soon see.
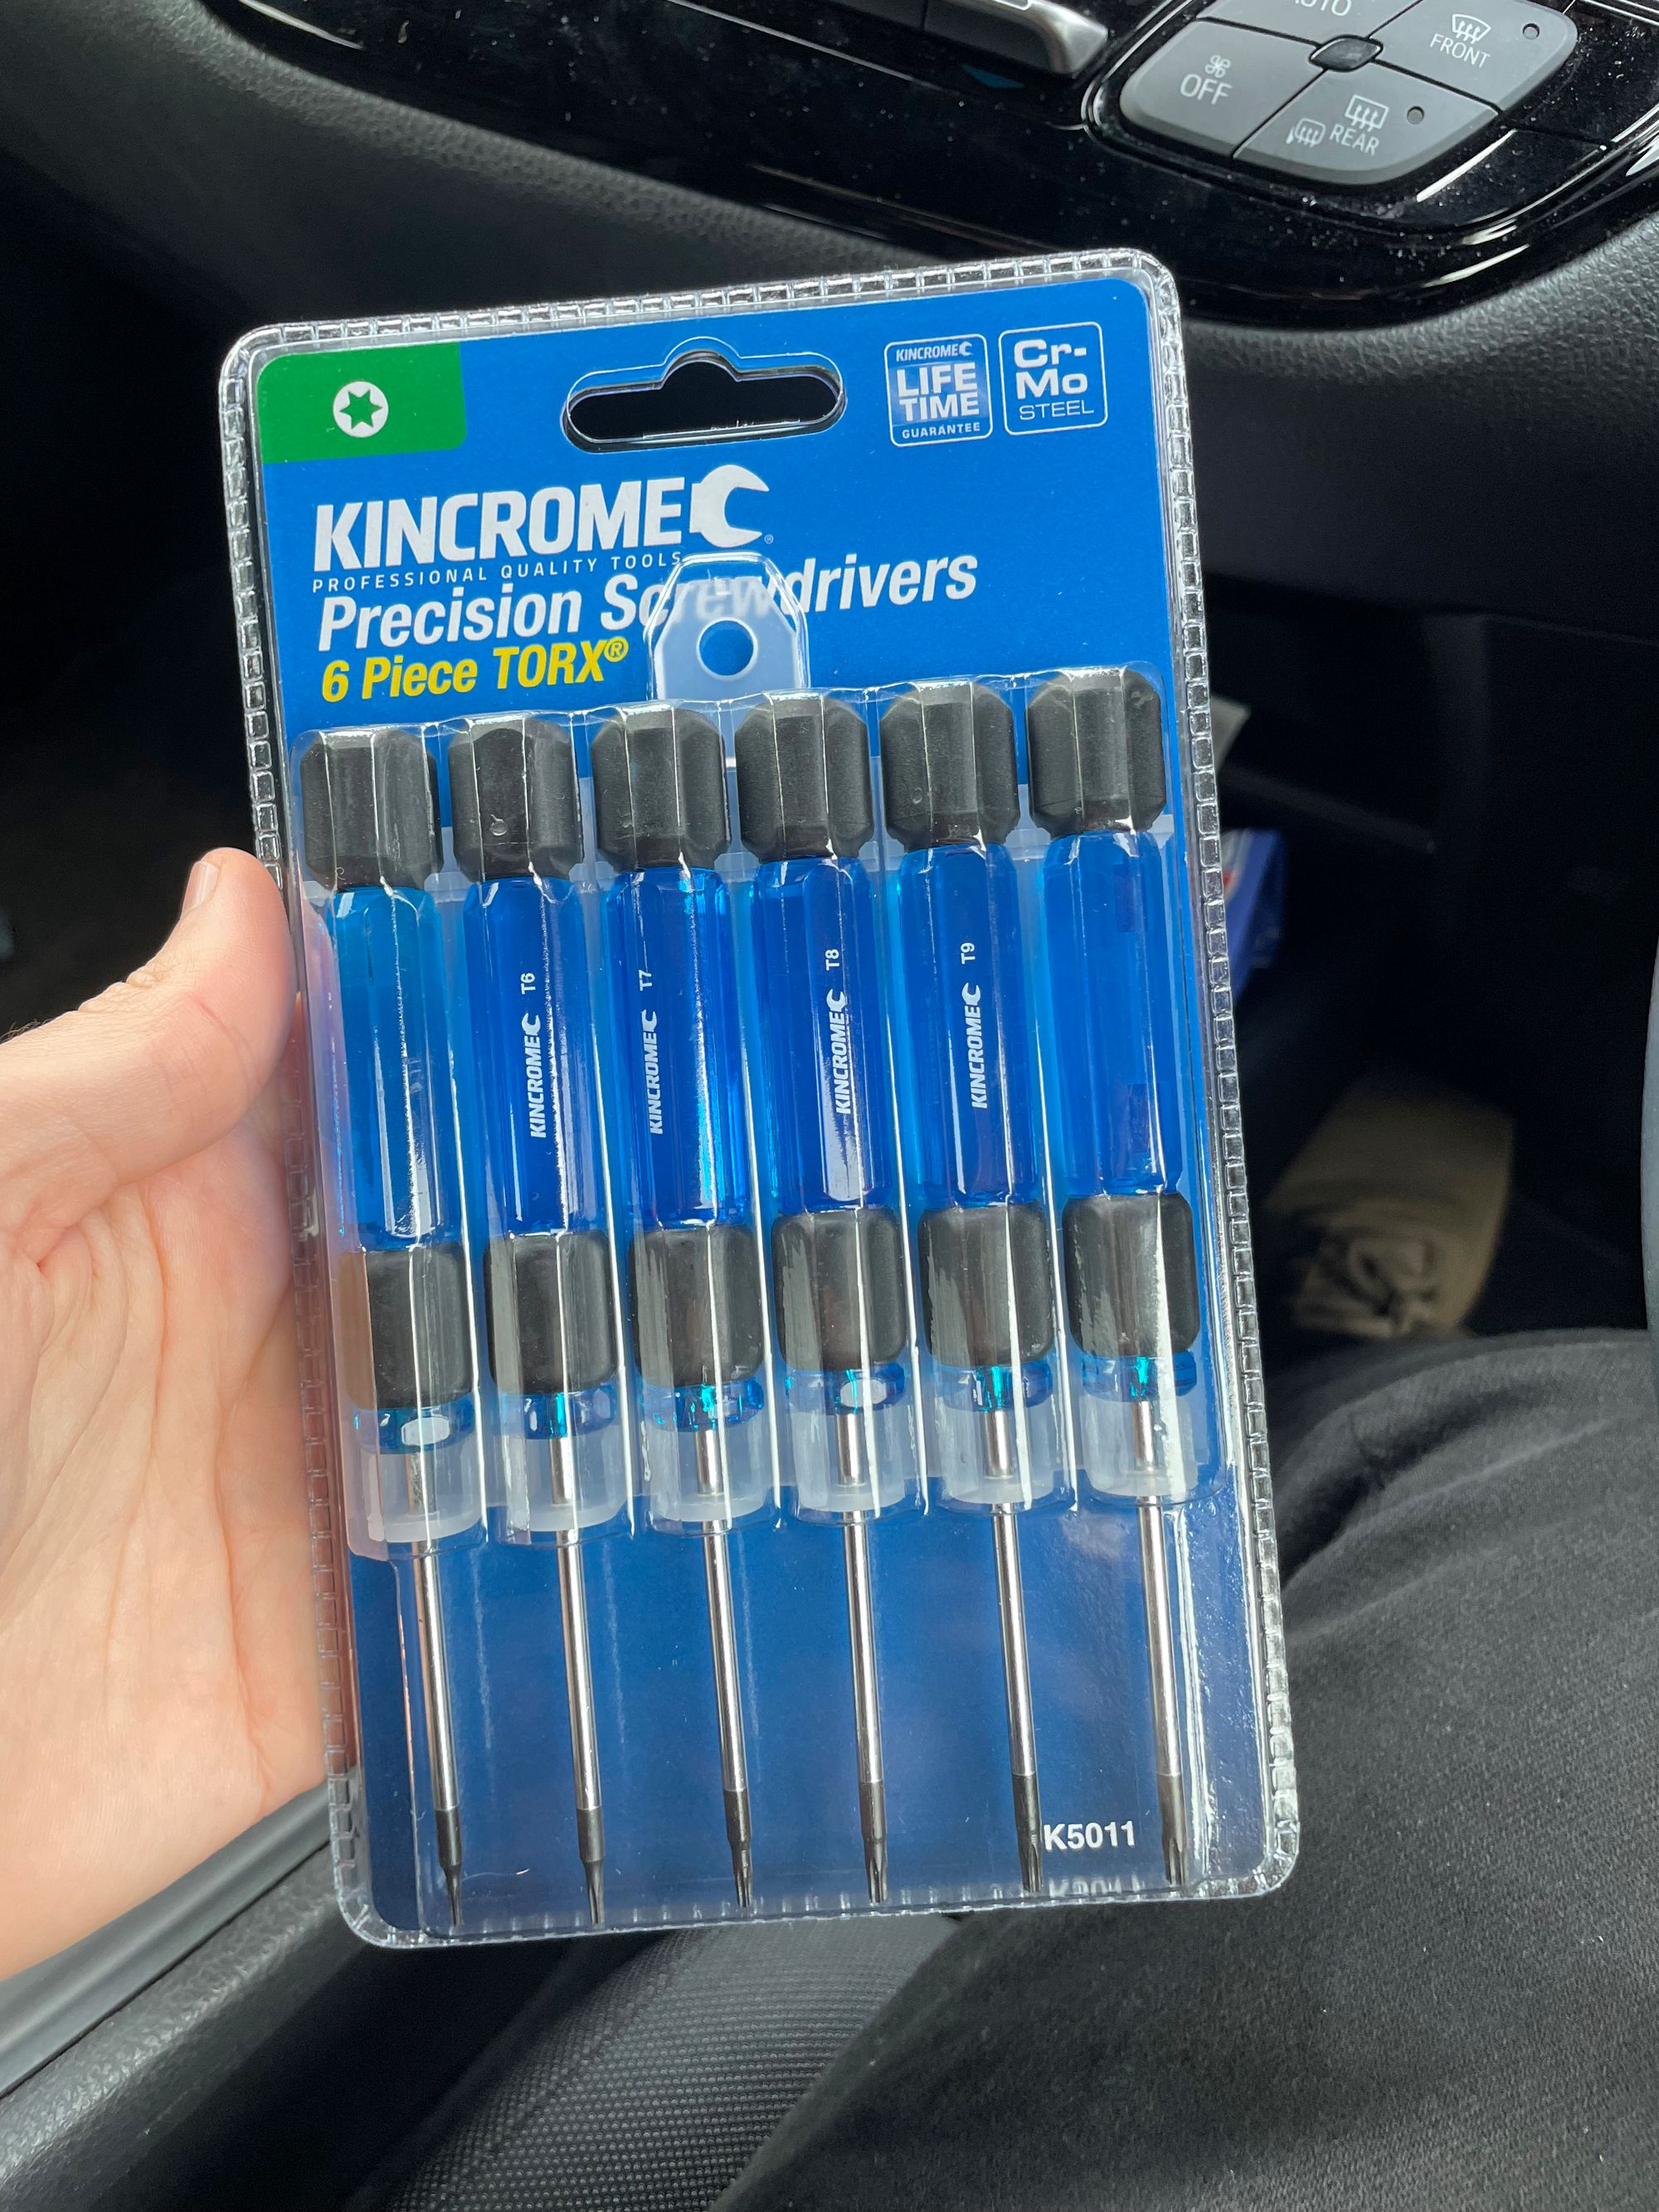
Starting out, this was where I got set up – a big desk, with my (gaming) PC showing the steps of the iFixit guide off to the side. To the right of the mat are the tools that came with the kit from L-R: a tiny screwdriver, pizza-wheel style adhesive cutter, plastic cards for prying and leverage, Torx driver bits (T8 and T10 – though if you're doing RAM as well, you'll also need a T5), a plastic spudger, and a really nice pair of tweezers with an anti-static coating.
Taking the screen off requires cutting through those nasty single-use adhesive strips that hold the screen – you can see some remnants on the right-hand side of the Mac in this picture.
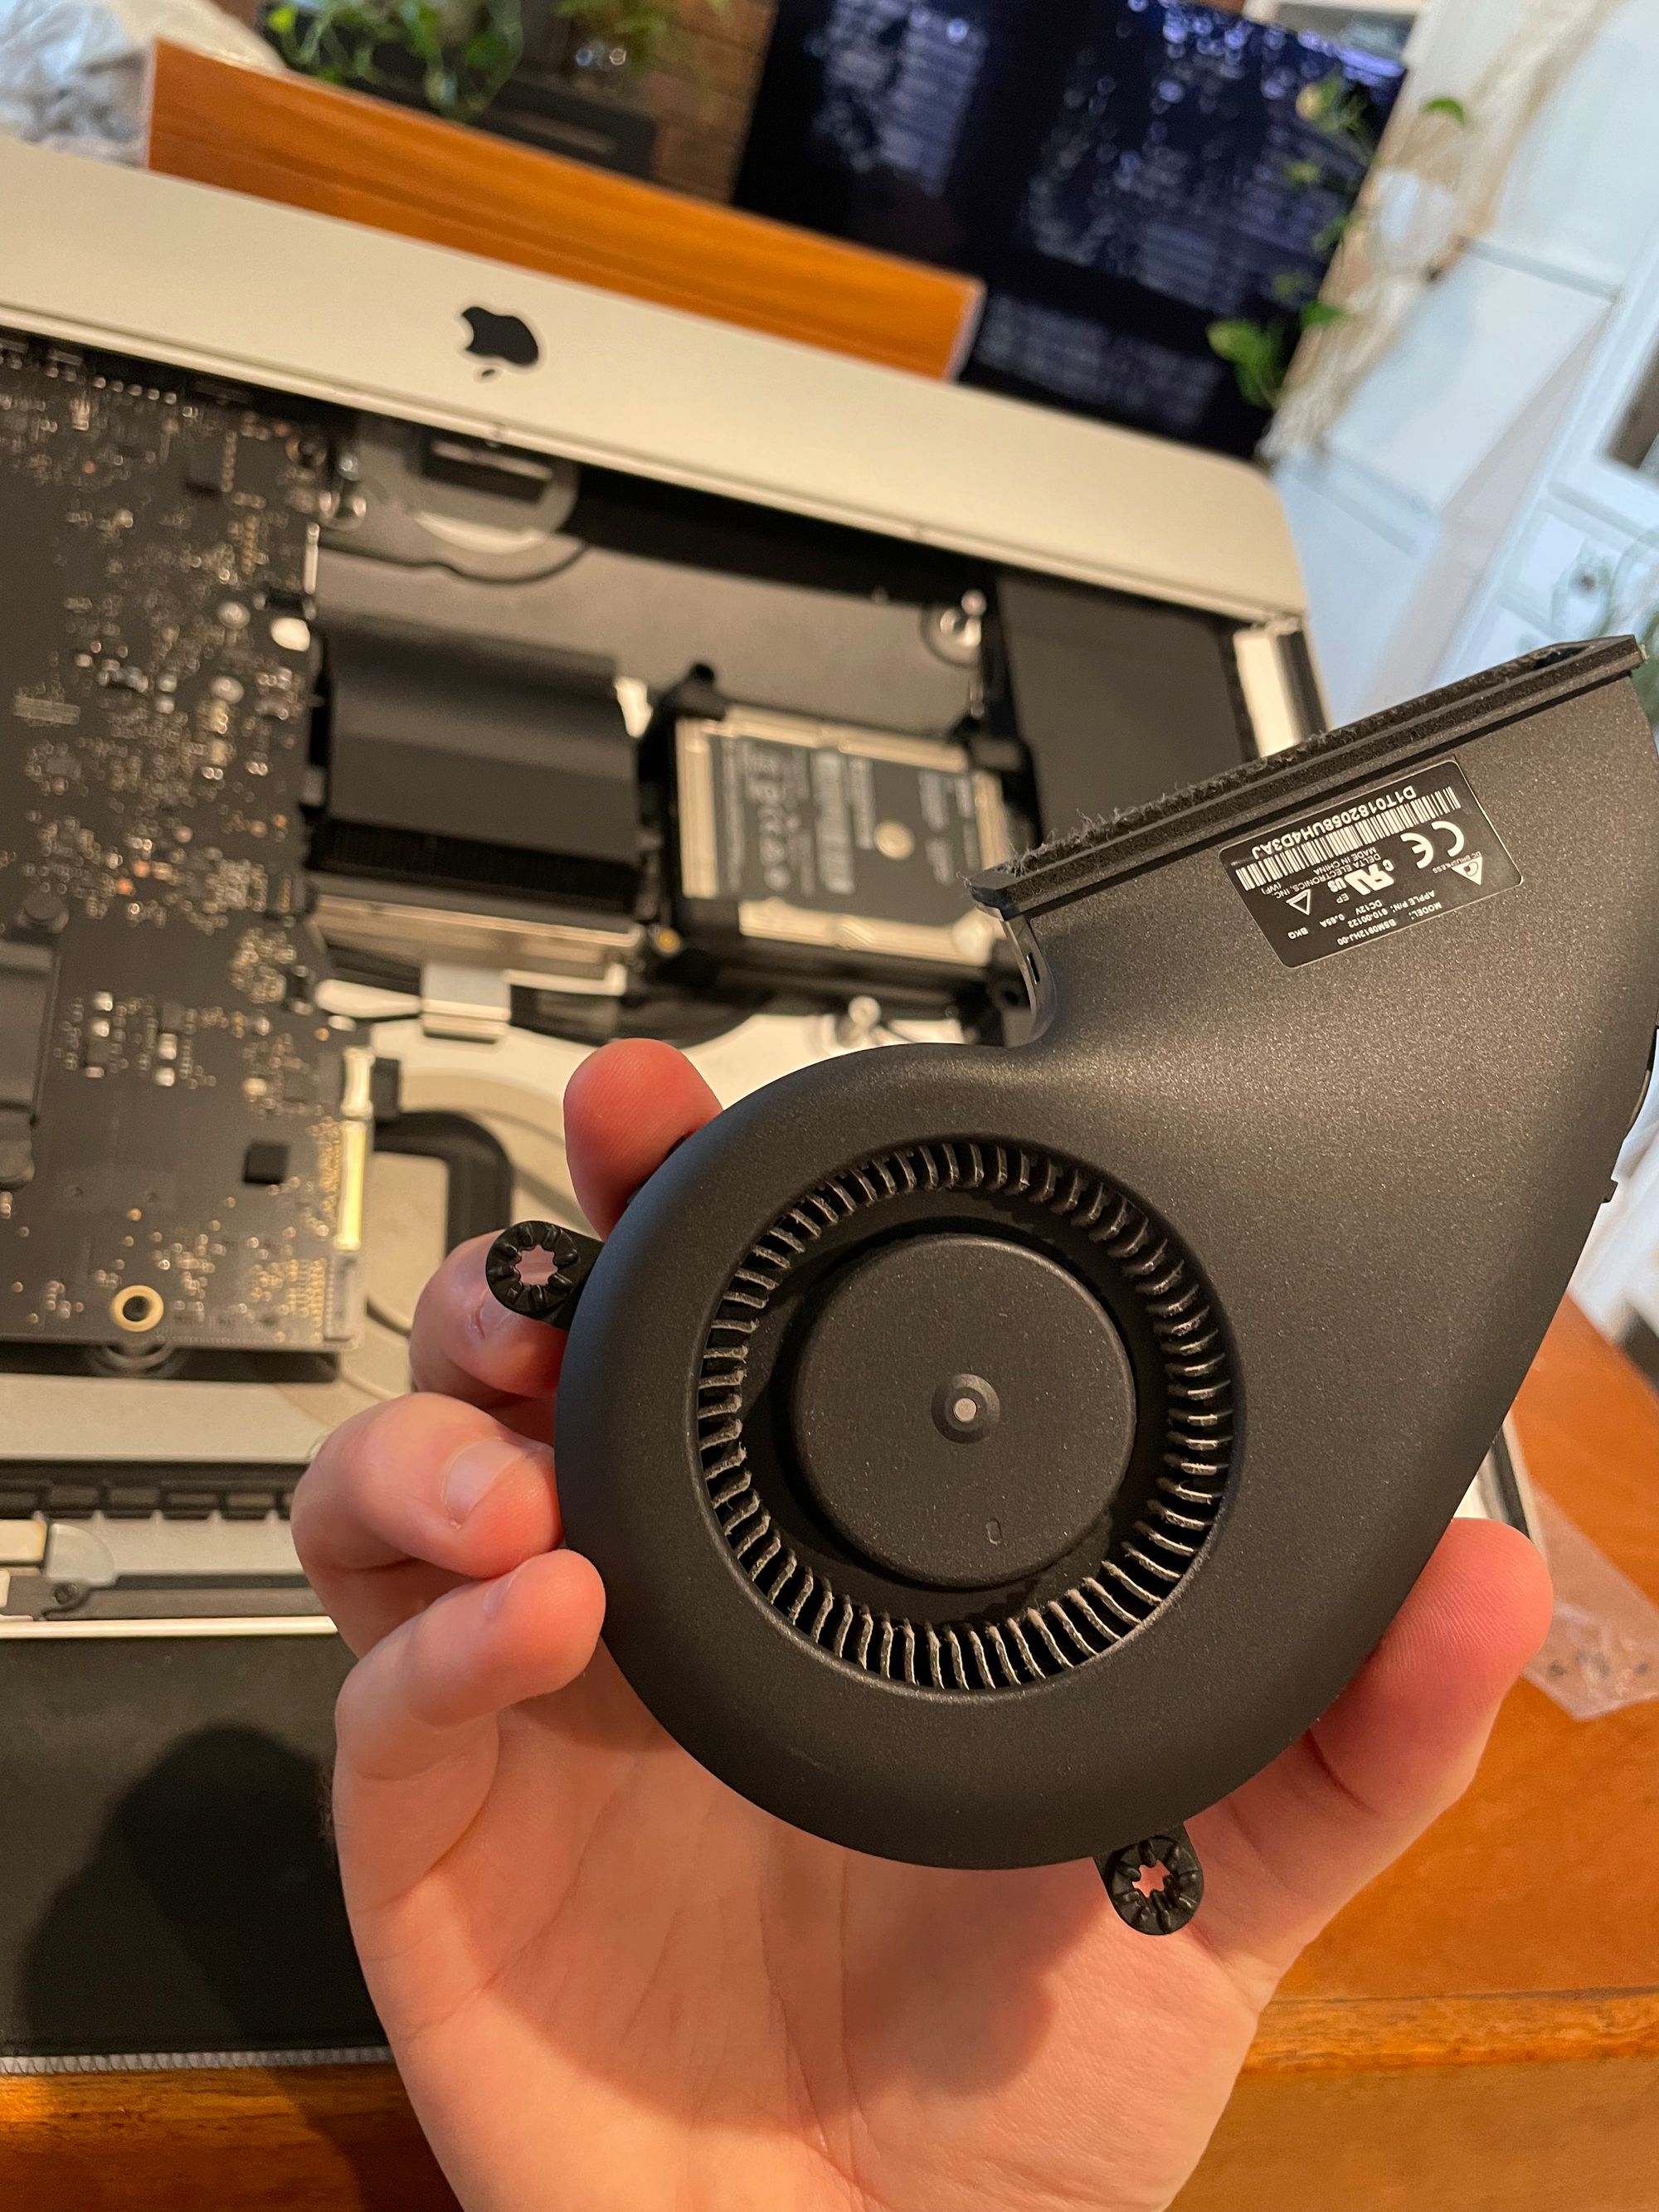
Getting into the guts we next remove the fan, which is tiny – no wonder this it's so quiet. This is not a power-hungry device.
Here’s the slightly dangerous power supply coming out. It’s surprisingly small.
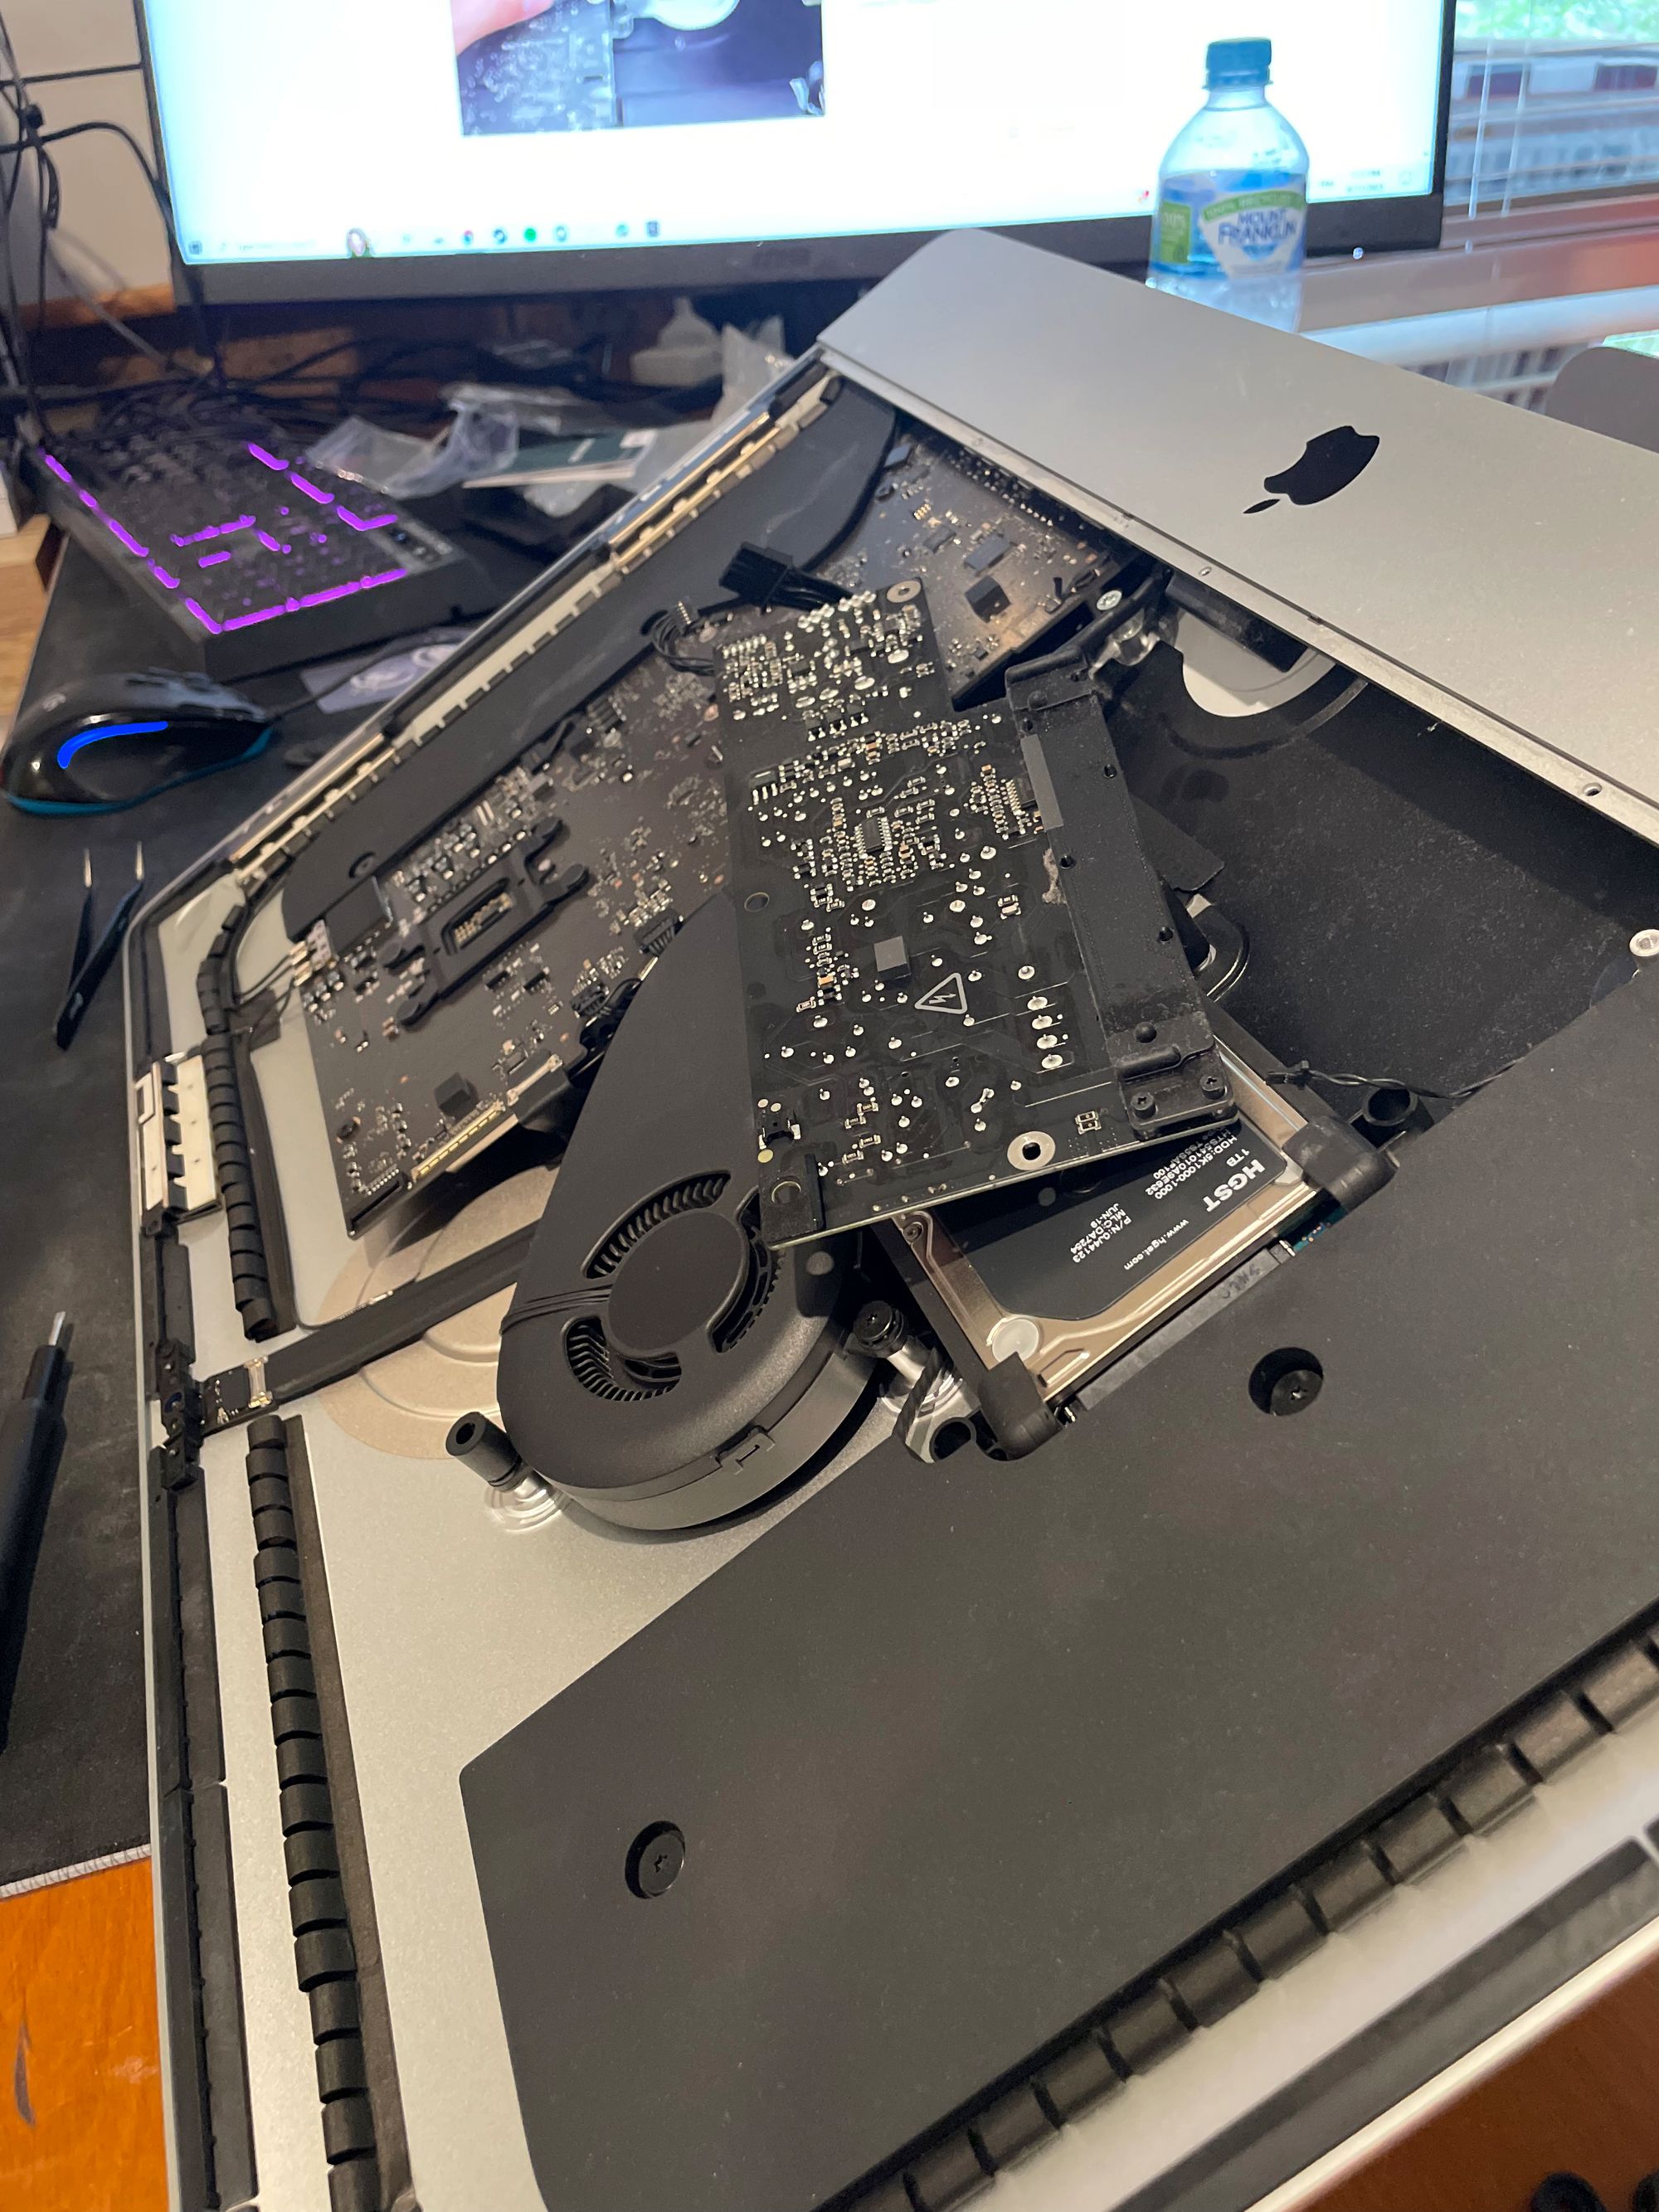
The single biggest issue with these late-2019 Intel iMacs, the last made before the introduction of the M1 chips, is that they have these incredibly slow spinning plate HDDs in them. Together with the changes to macOS over the years that increasingly expect to operate from a relatively fast SSD means that this was basically the chain dragging this device down, right from first assembly.
Running macOS off an HDD is an agonising experience. Whoever decided to include them in these iMacs deserves to be held upside down by their toenails, because it basically turned every single device from this era into near-instant e-waste. I bet it helped make Apple very rich though.
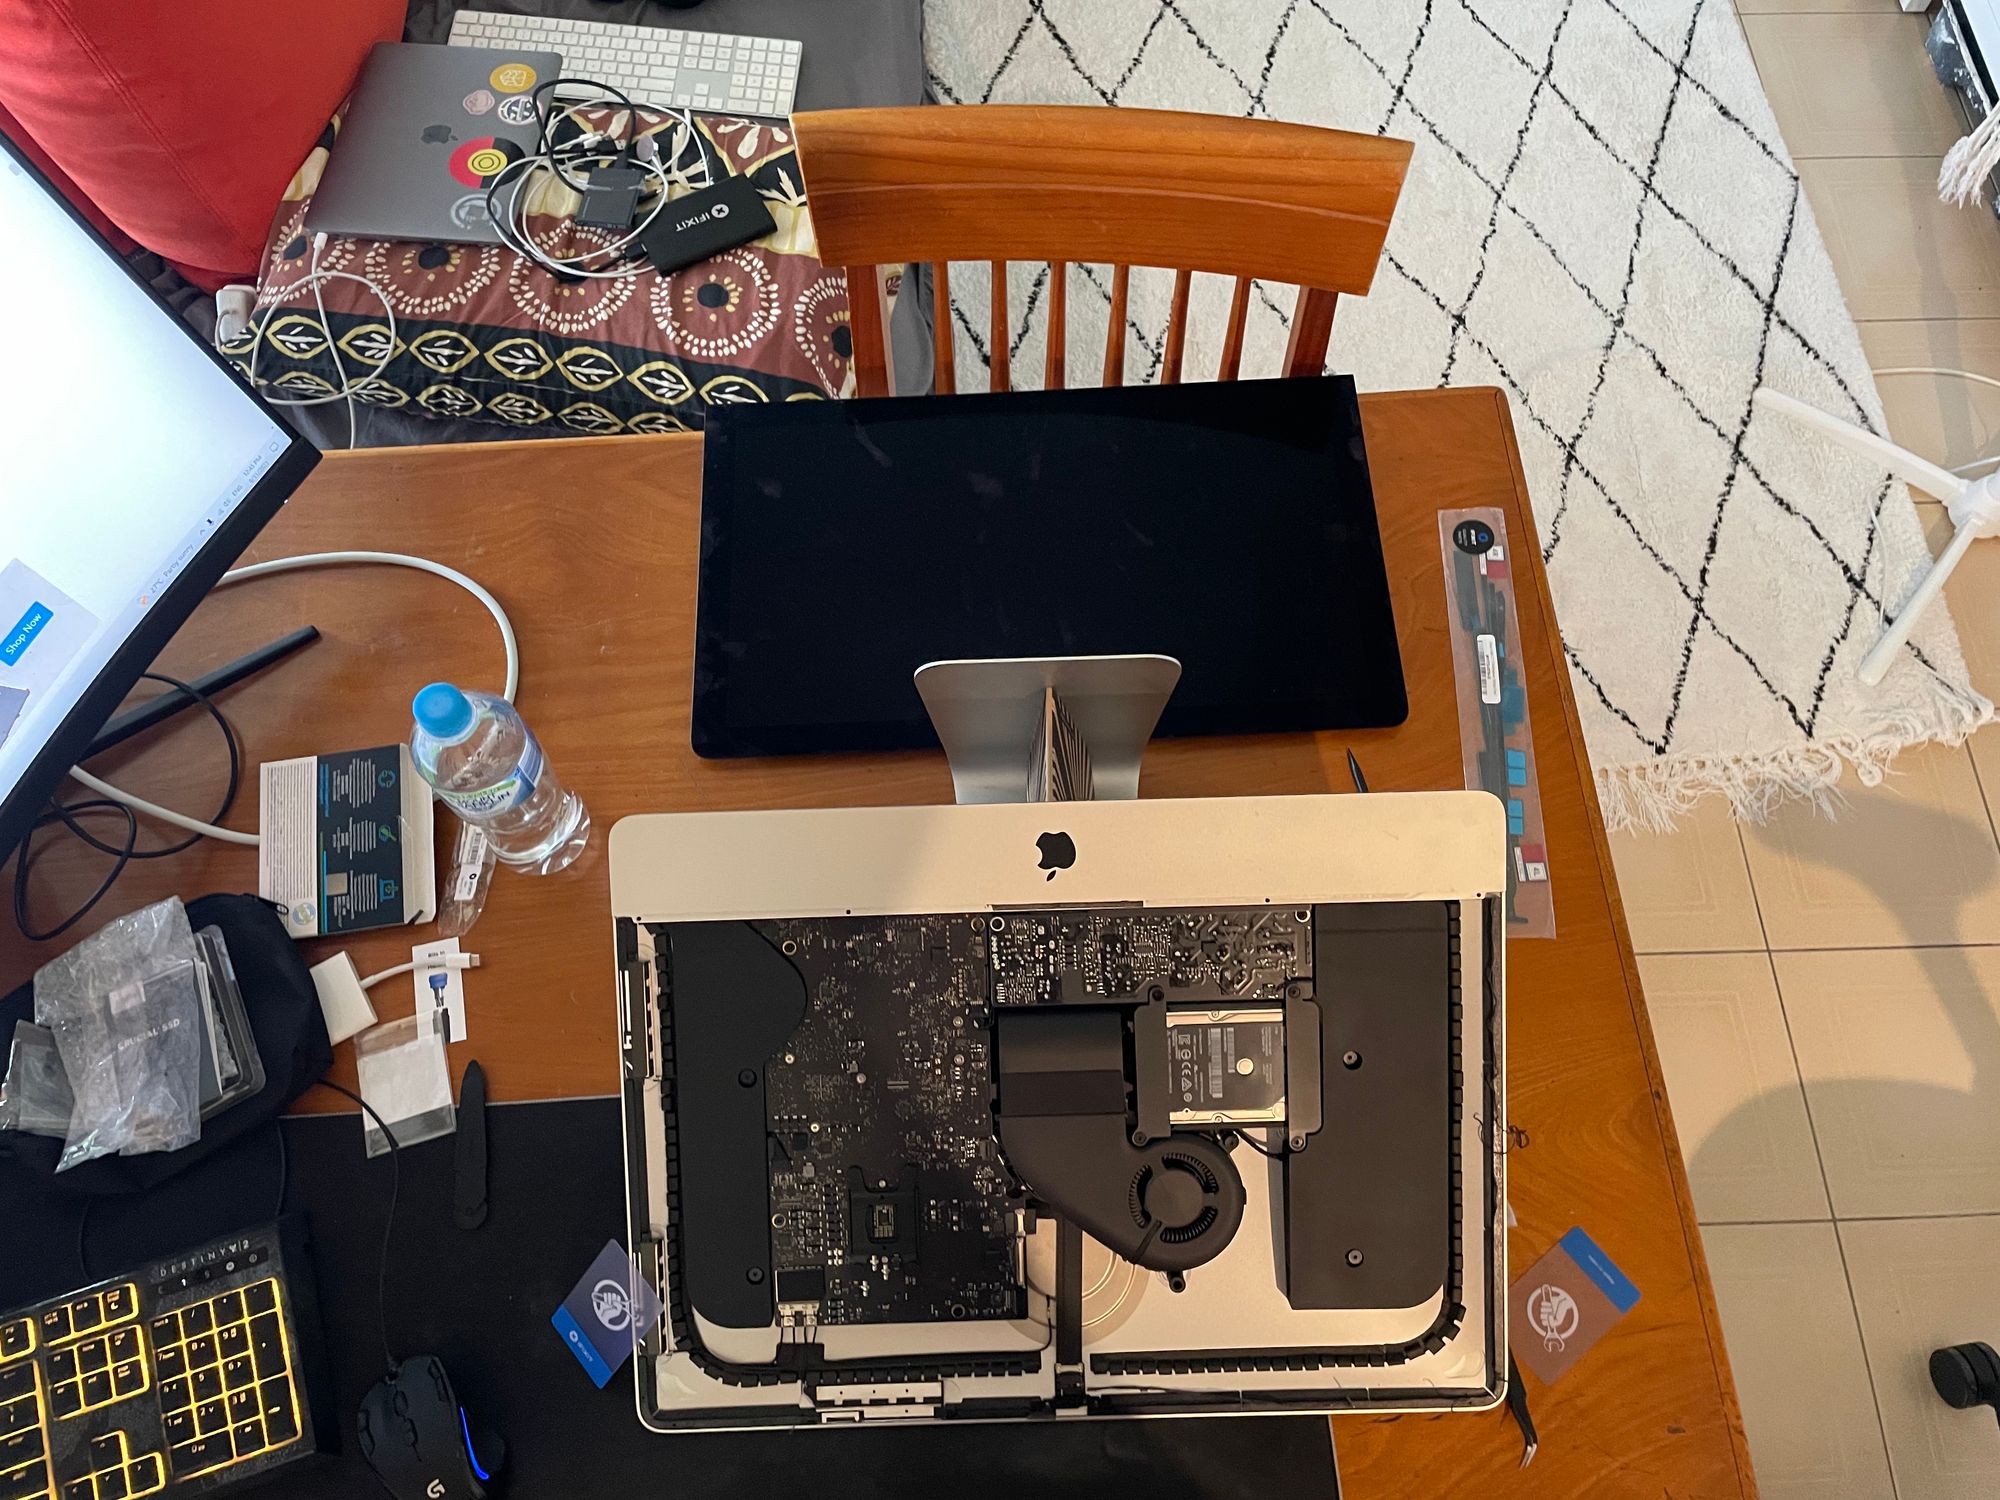
After about an hour of disassembly, I got to this point – the fan and power supply are out, but I was now held up by two tiny screws that, frustratingly, I didn’t have drivers for.
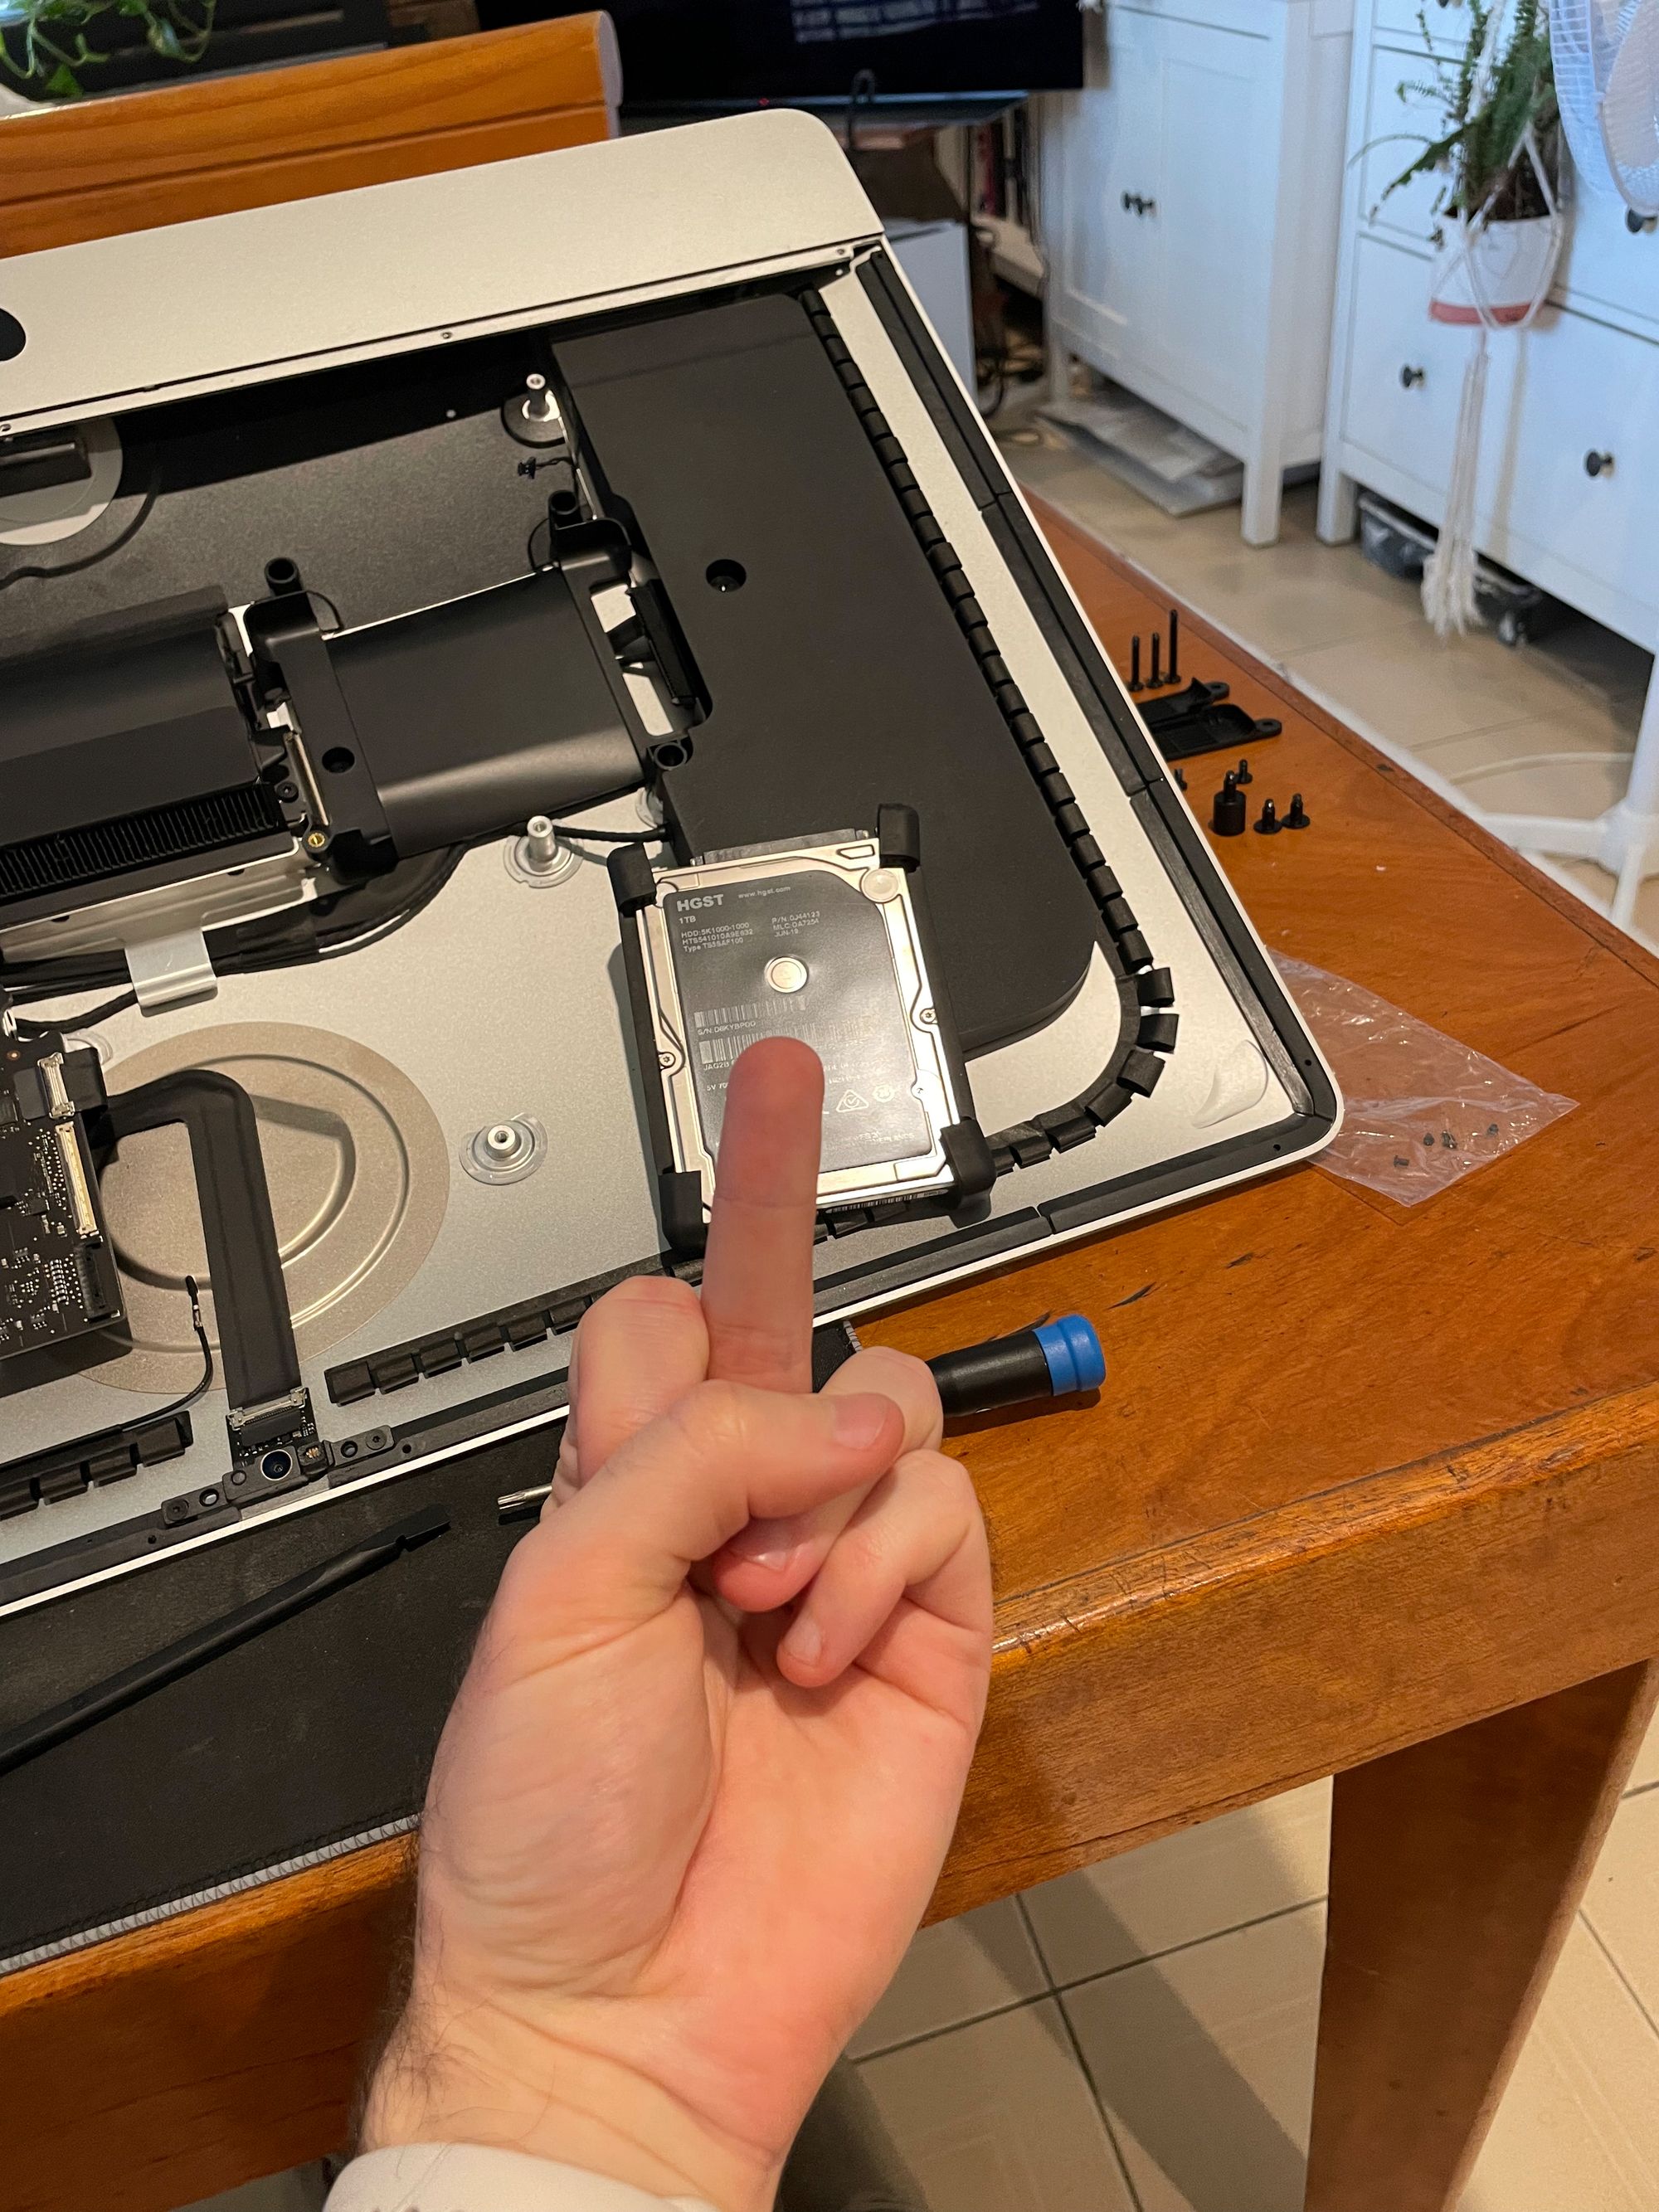
On the RHS of the table beside the Mac in this image is a number of disk drive mounting brackets, all the screws I'd removed to this point, and the adhesive strips for later reassembly (in the plastic packet).
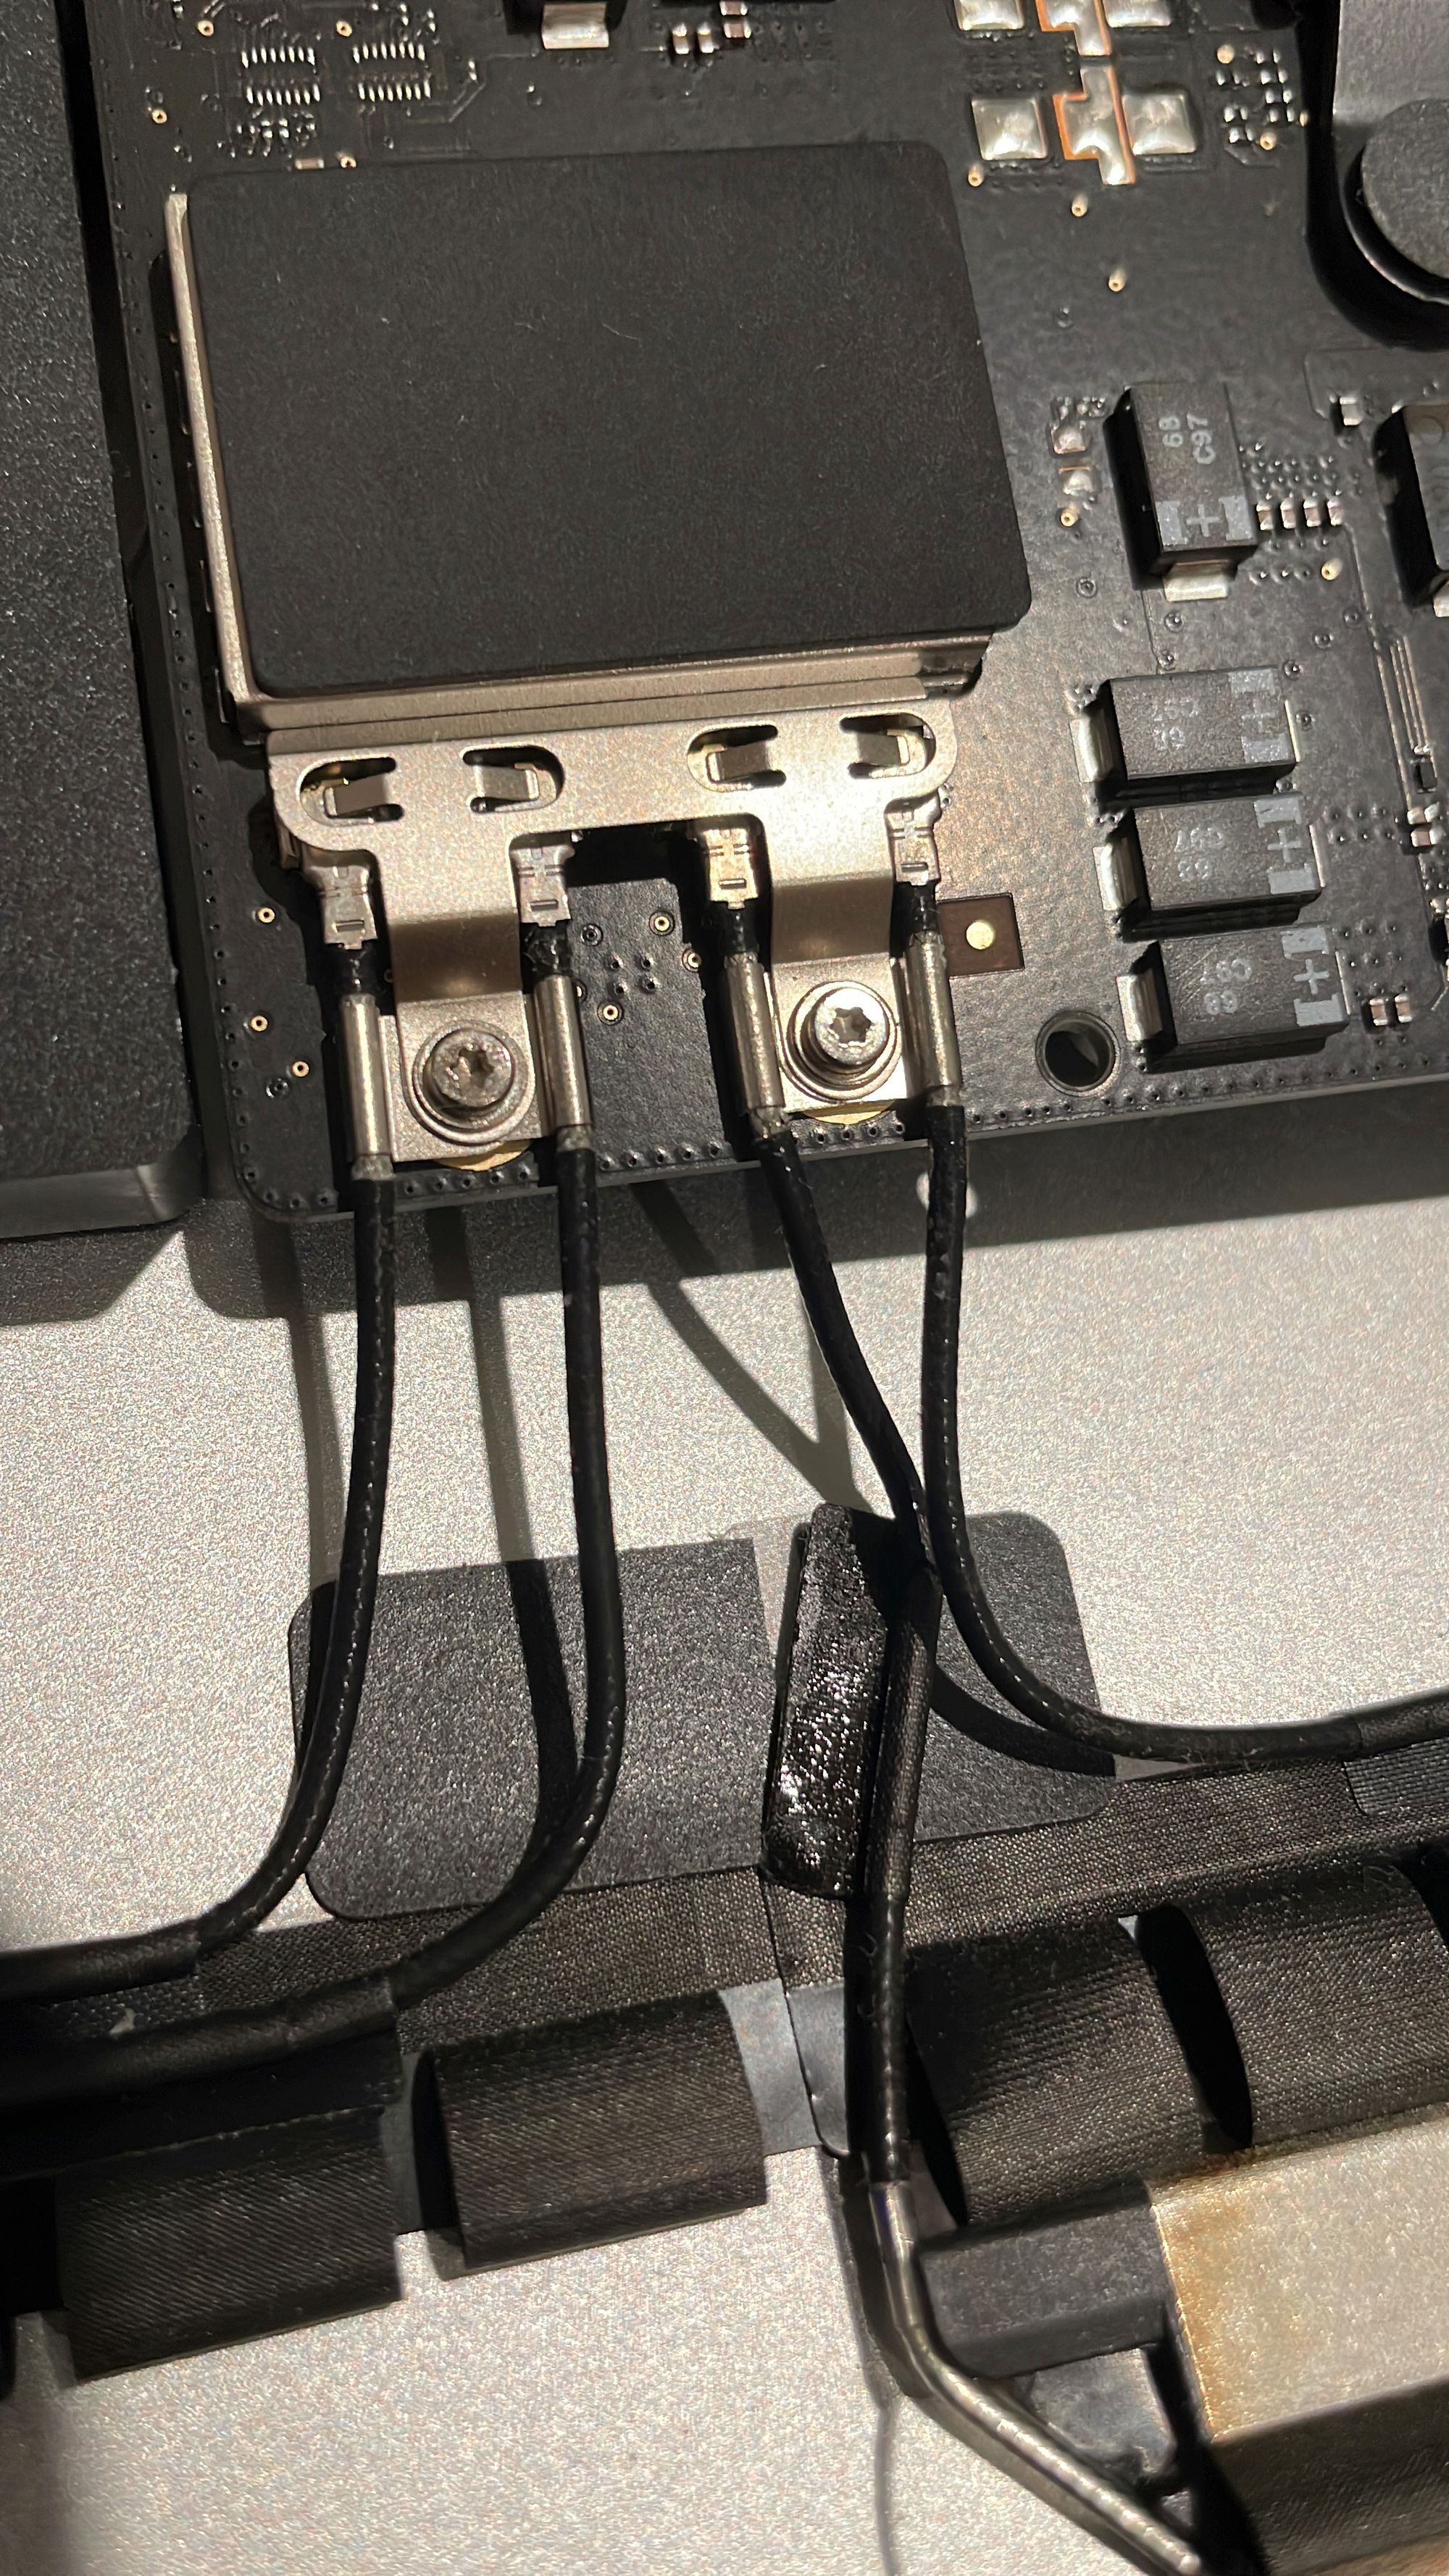
Two T5 Torx screws attach the Bluetooth and wifi aerials, and the driver bits for them didn’t come with the iFixit kit I bought (because I got the HDD replacement kit, not the RAM replacement kit – my own fault!), and my own set of Torx drivers are boxed up somewhere in my storage unit until I move house.
A trip to Bunnings to get the right screwdrivers and we’re back in business. Add another $30 to the cost though.
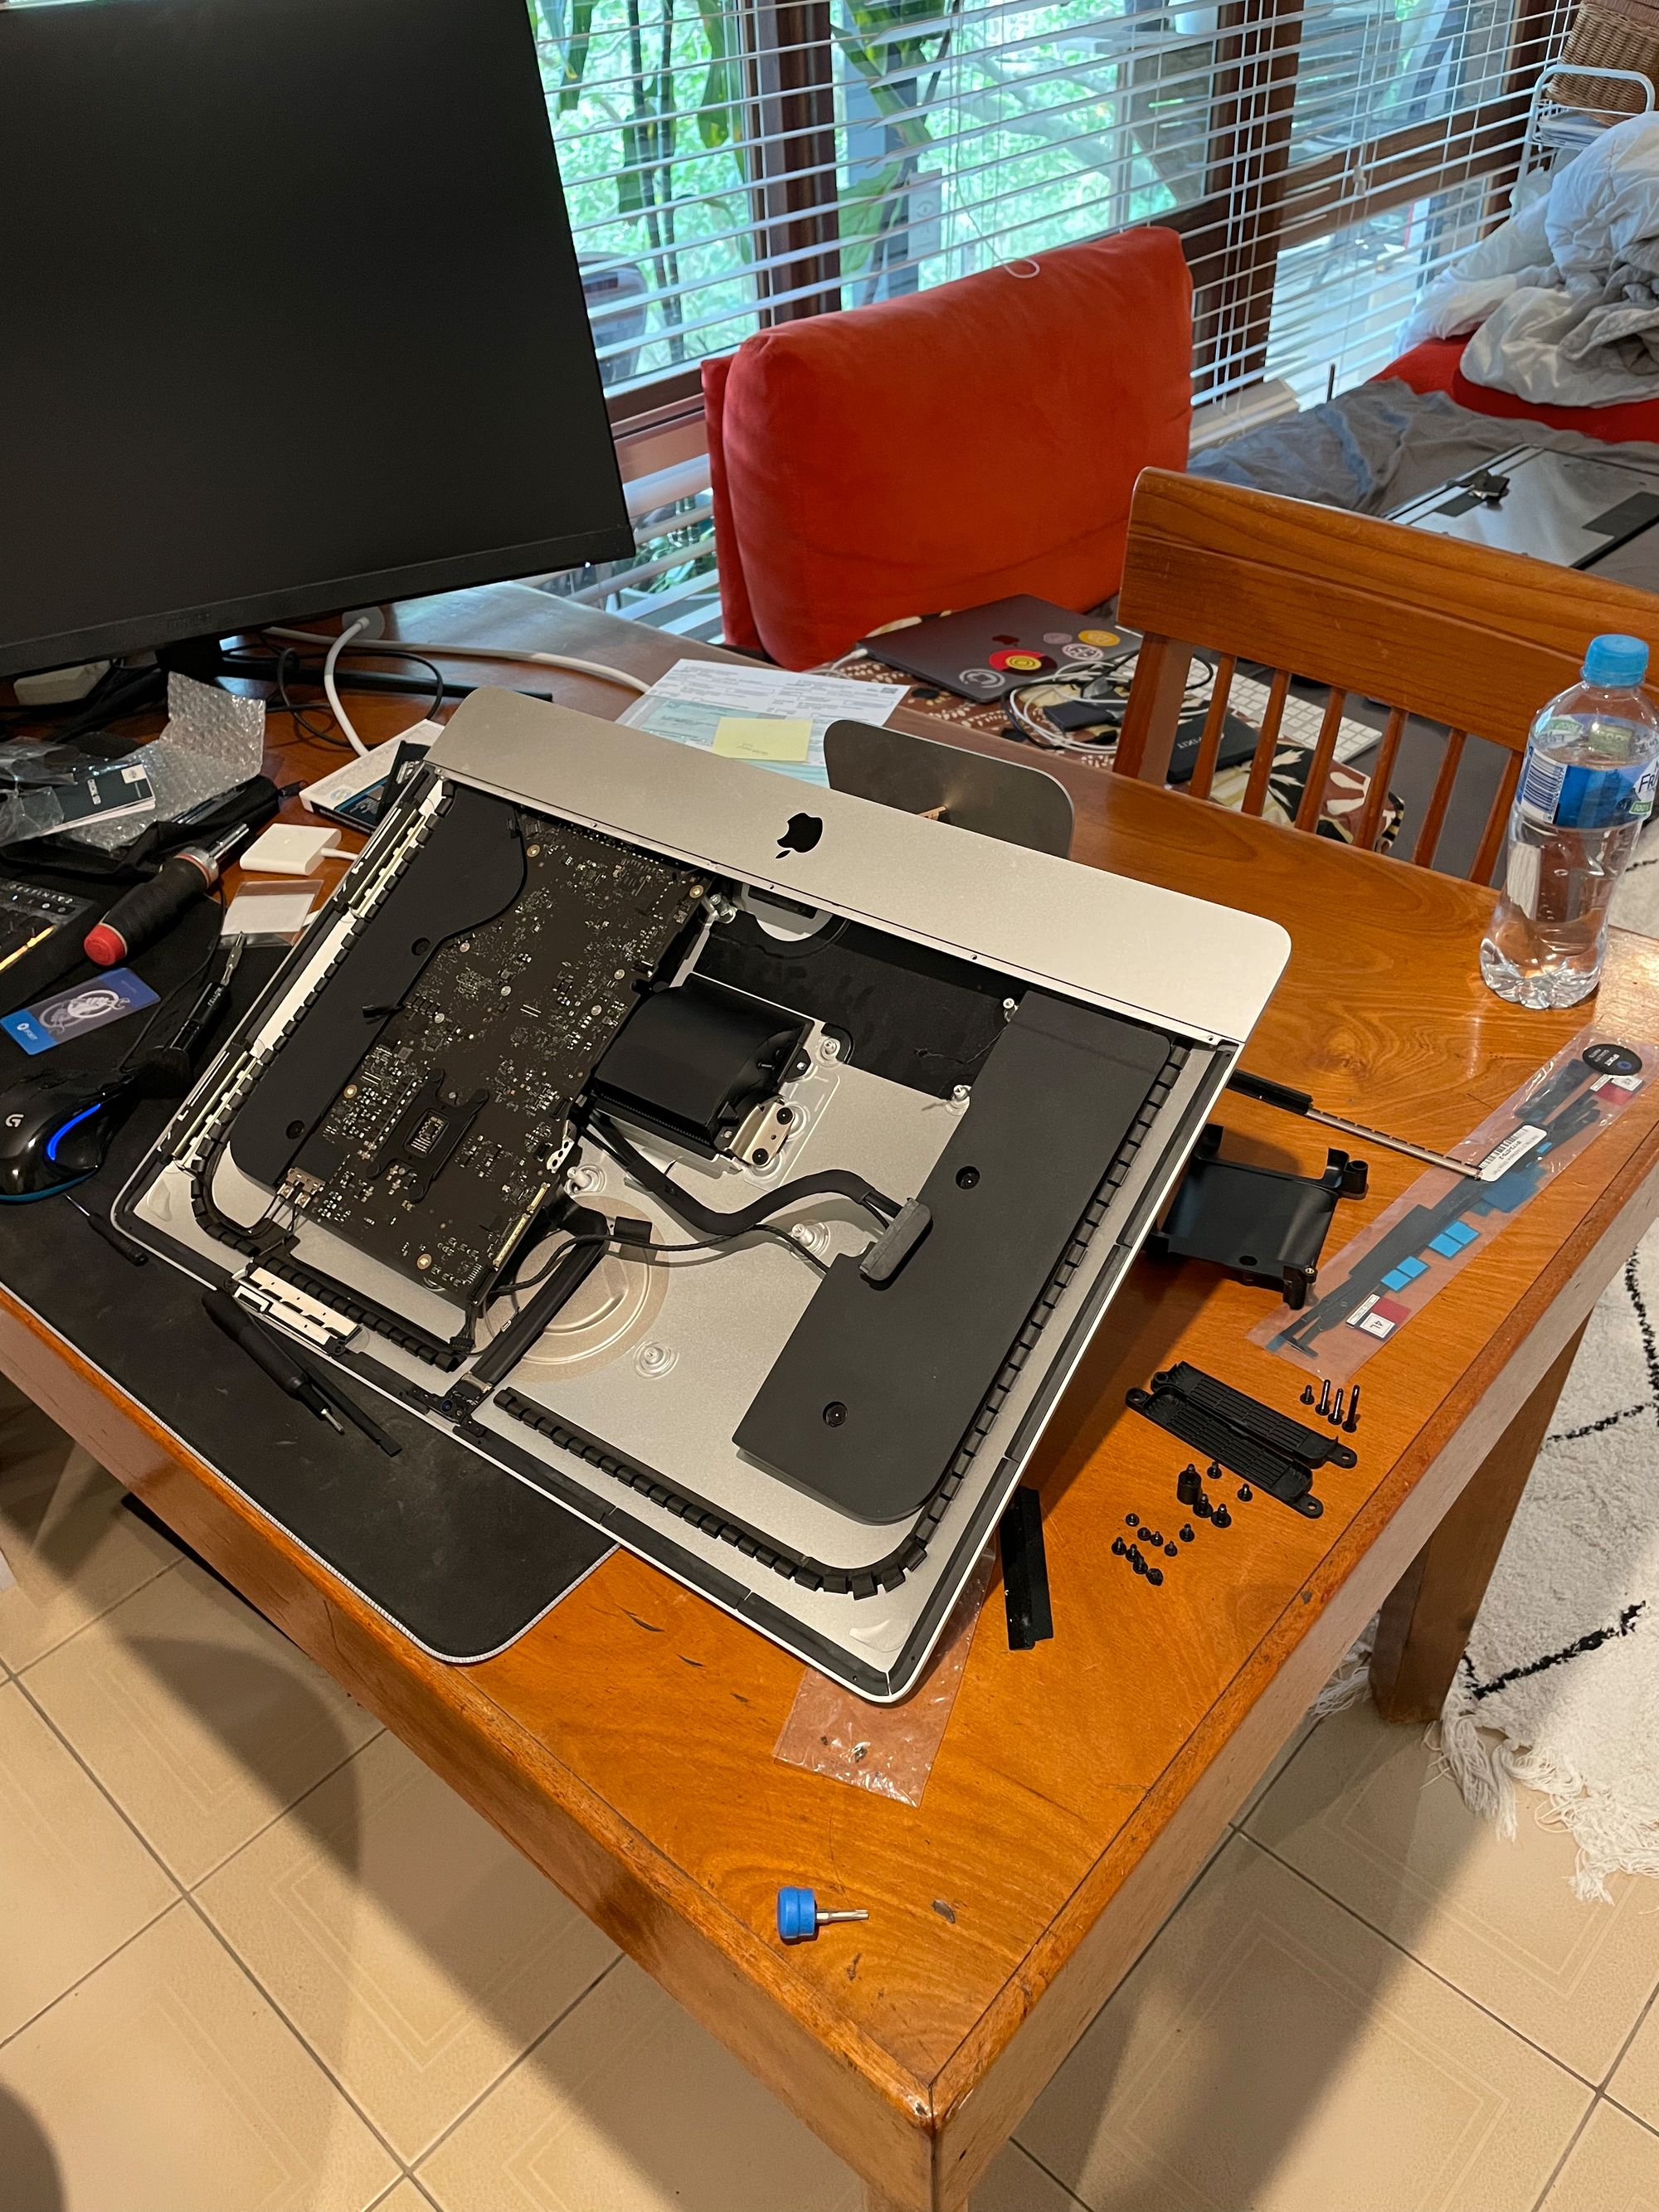
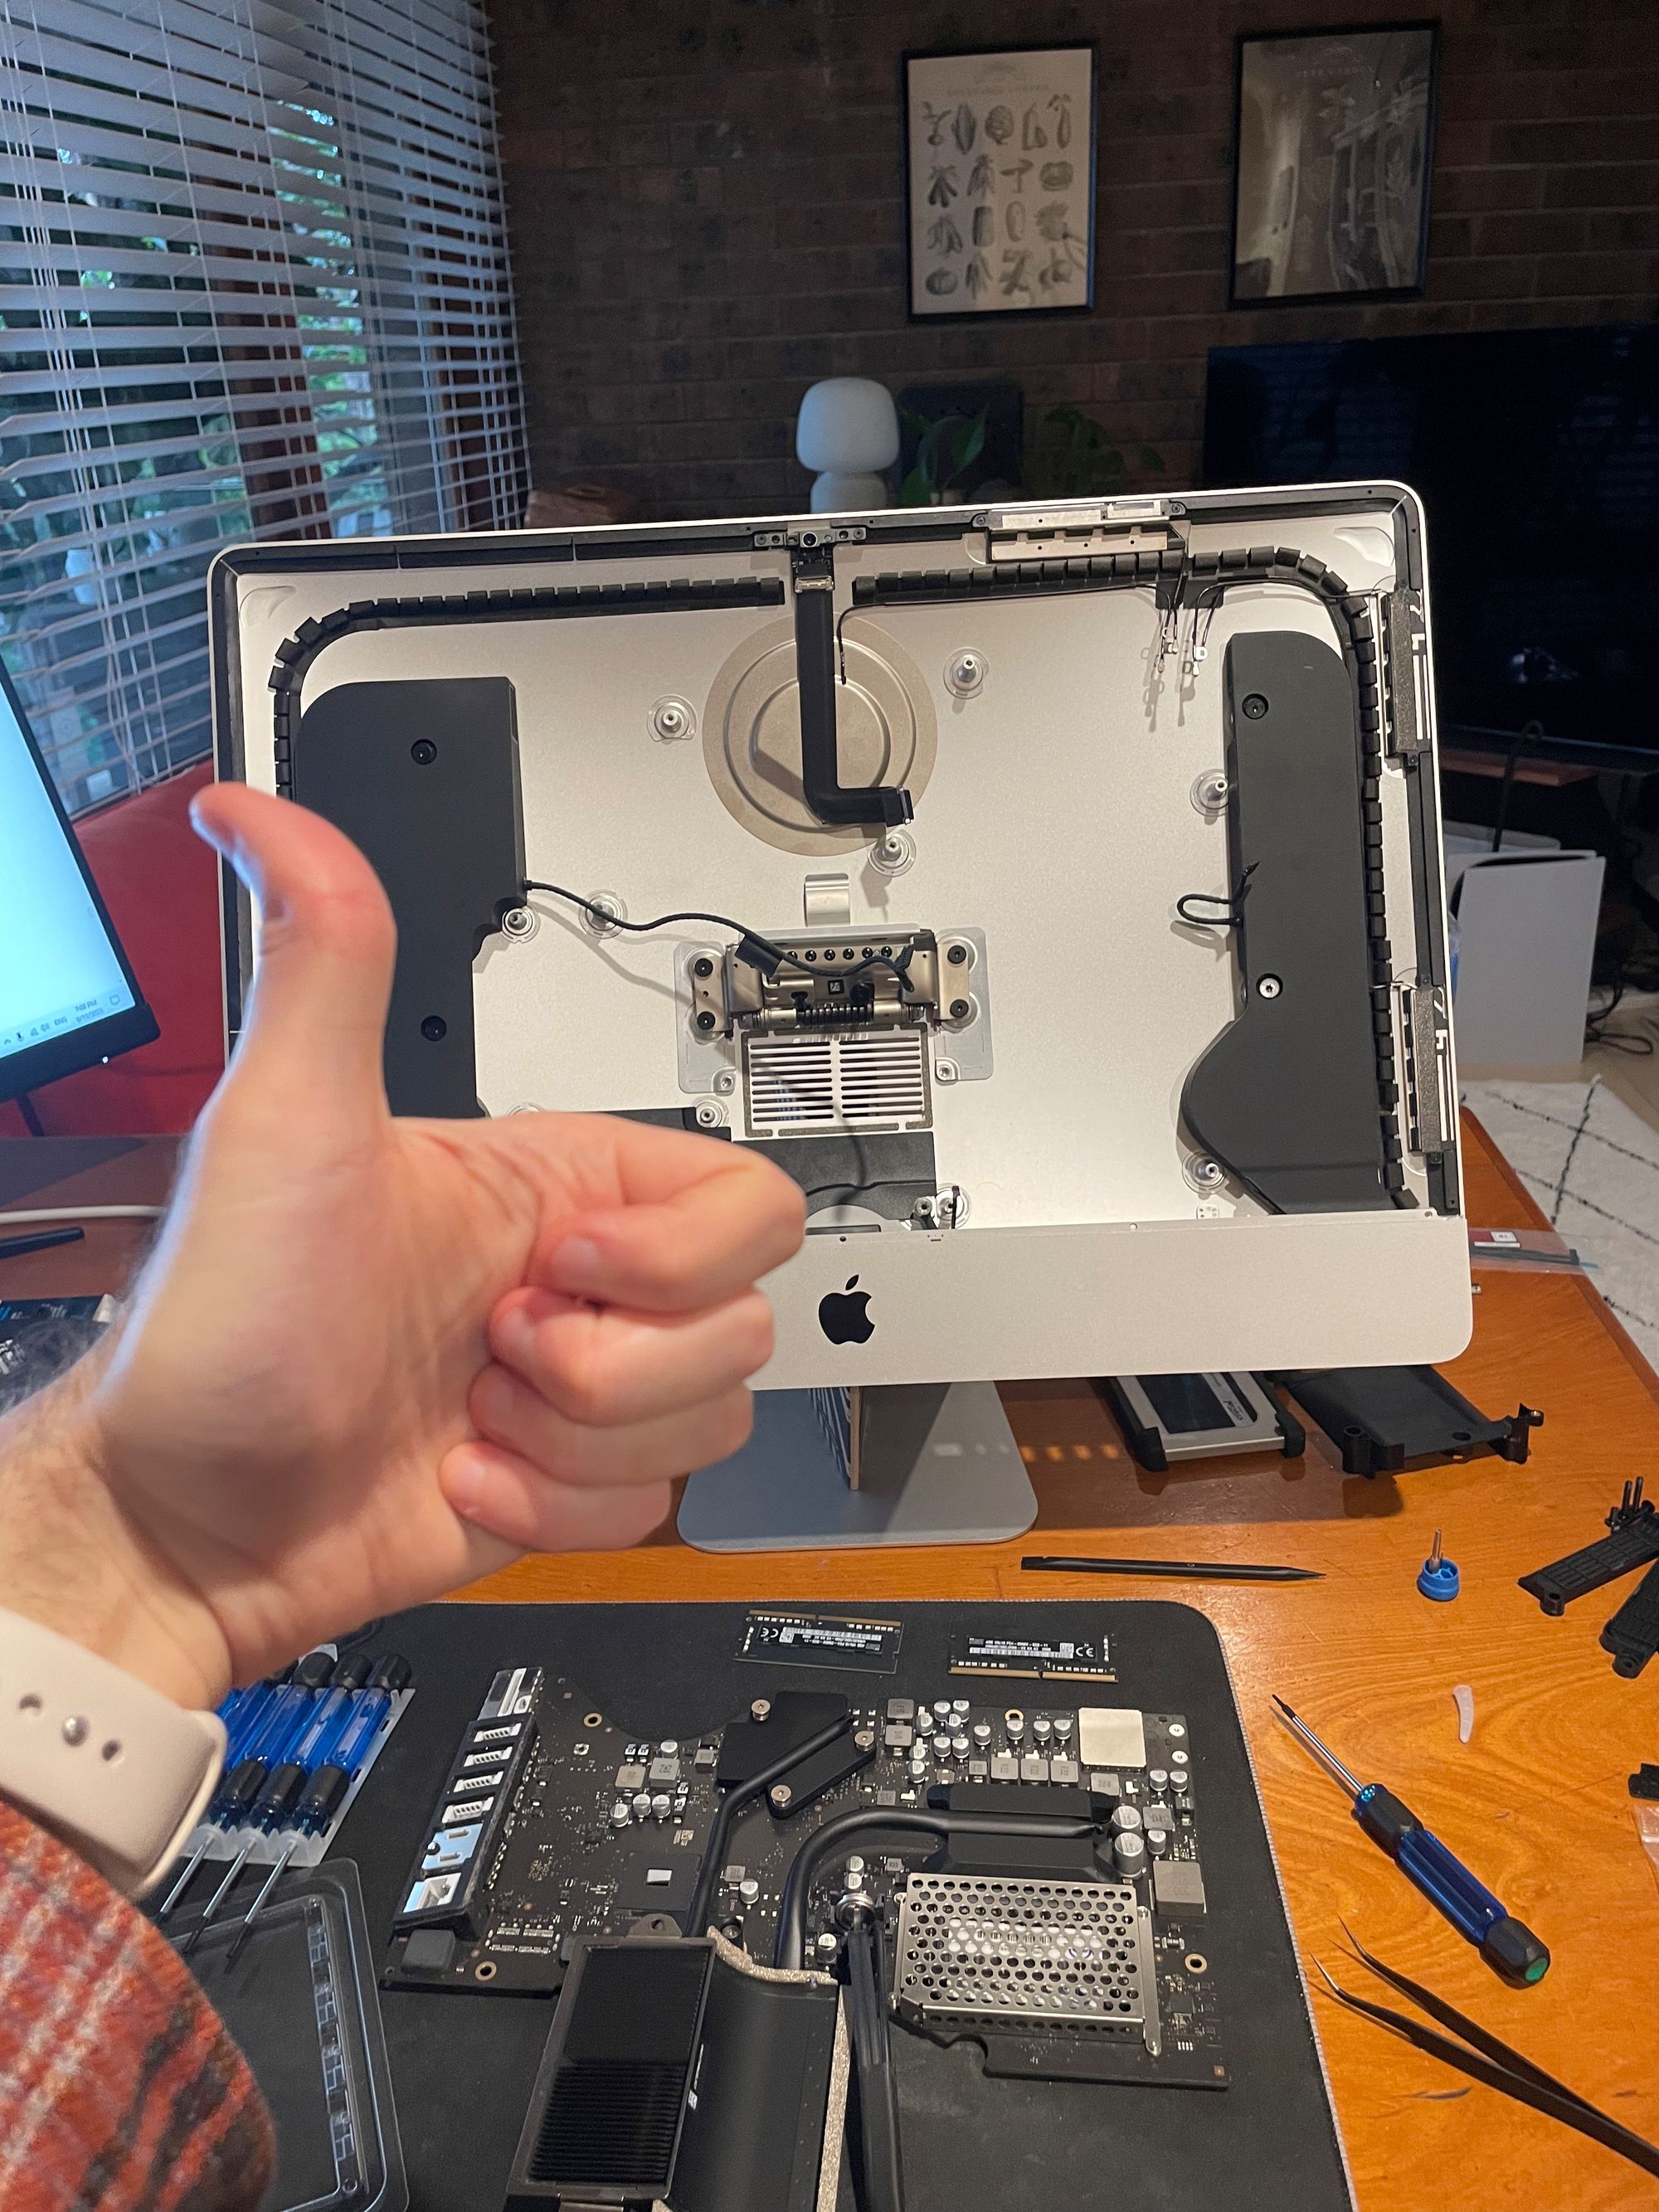
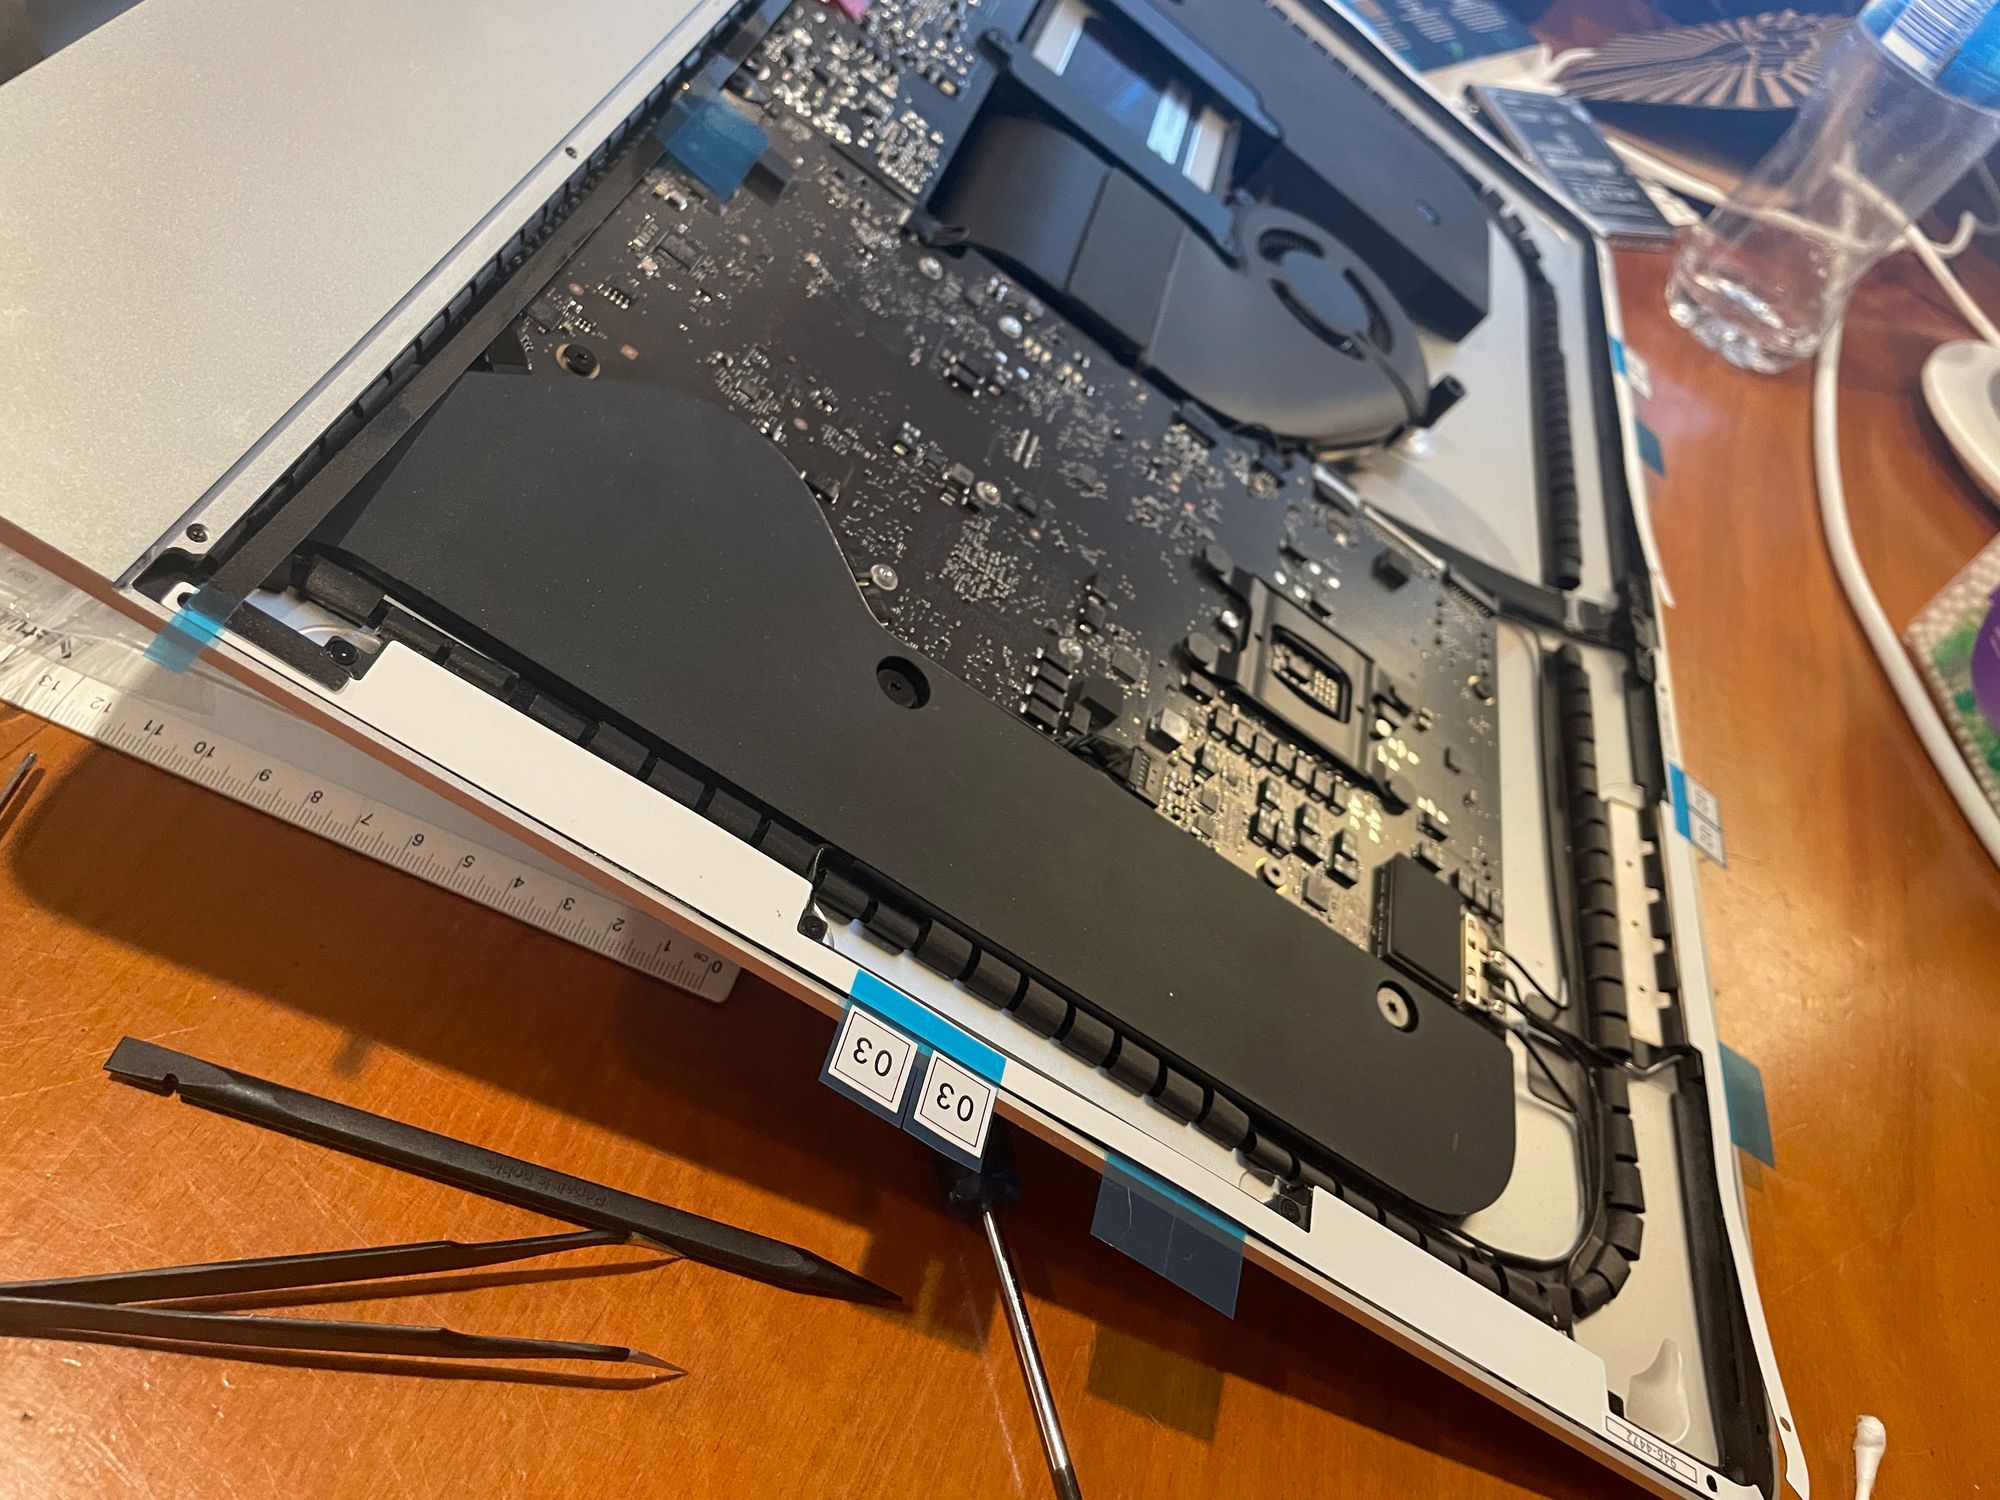
Disassembly completed. The entire logic board can be laid out on the bench. It's tiny. You can see all the IO ports on the left of the board – they face out the back of the chassis. The RAM is under that probably unnecessary metal cover with the holes in it.
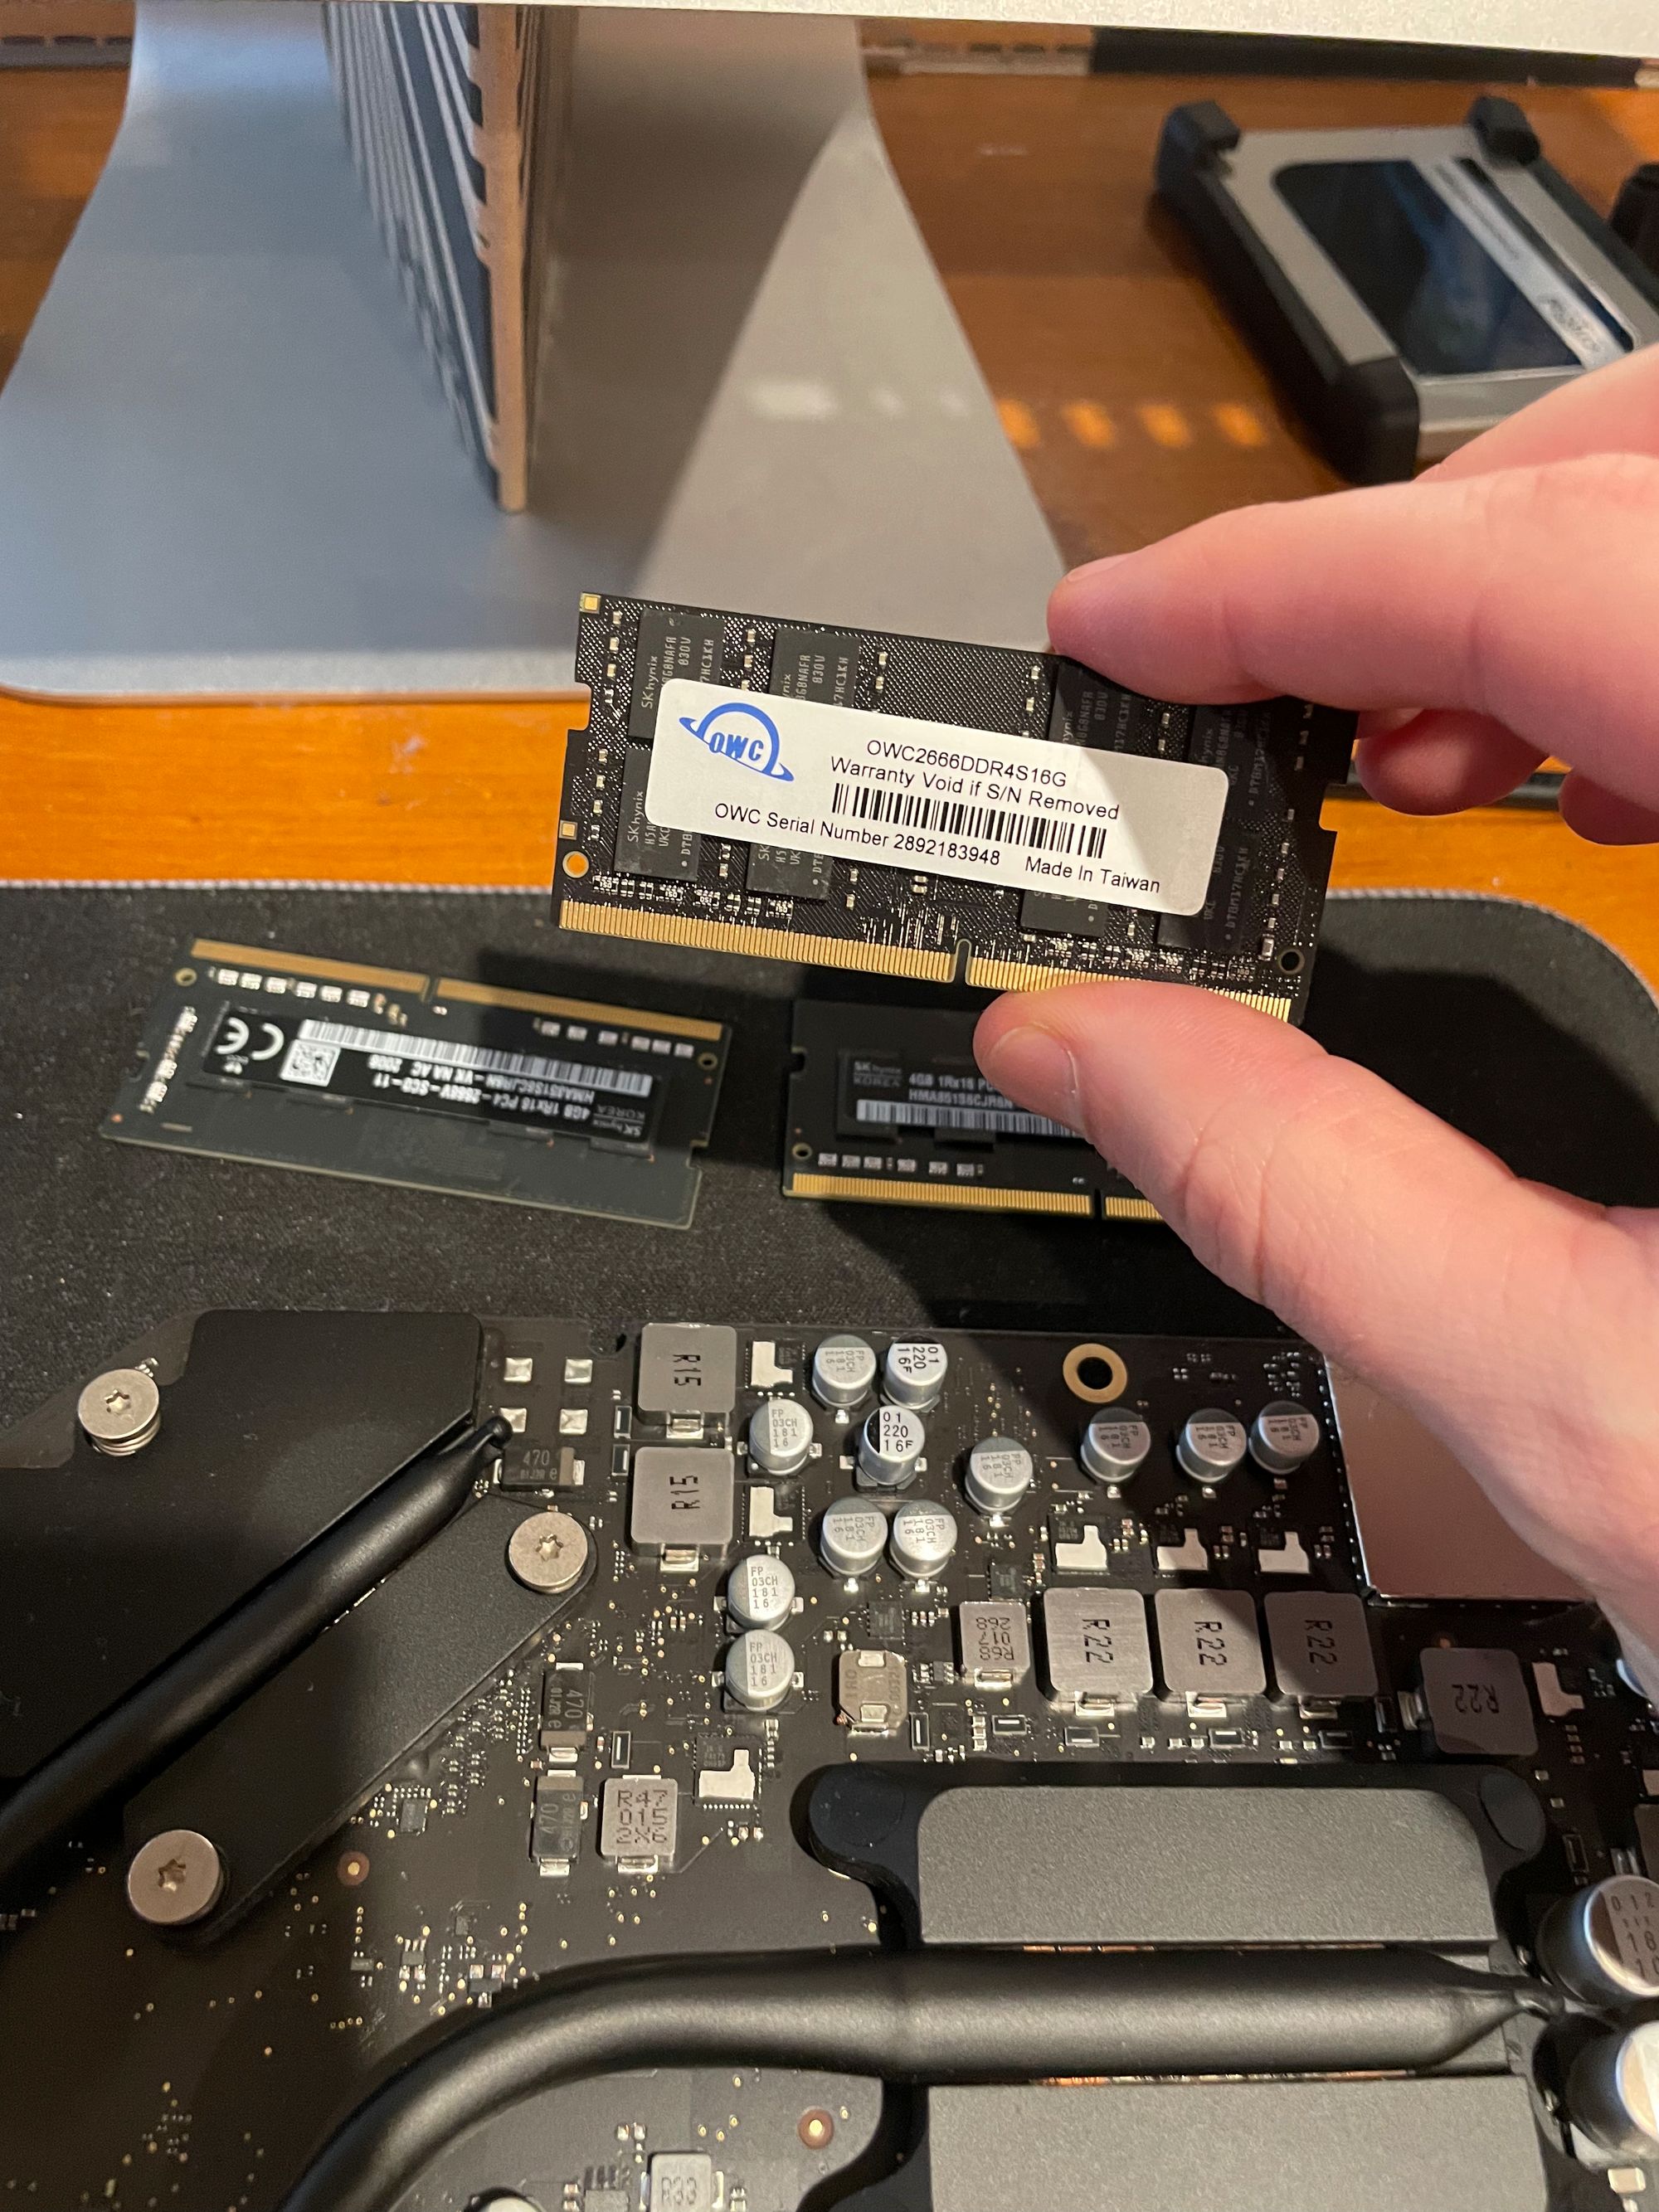
Here’s the new RAM going in – a single stick of this is 2x the total that was in there before, so I’ve now quadrupled the memory. OWC seems to be the main brand that sells iMac RAM, and I could probably have saved a few bucks by buying it directly, but I am happy to pay a little more for convenience and not needing to research precisely the right RAM timing, SKU, etc for compatibility.
Disassembly is the relatively easy part – figuring out where all those different screws go back takes longer. Twice I had to take a part out because I realised when I got to a later stage that I had used the wrong length of the screw or had used a T8 where I should have used a T10. Some of the screws were also tiny, they are terrifyingly easy to lose.
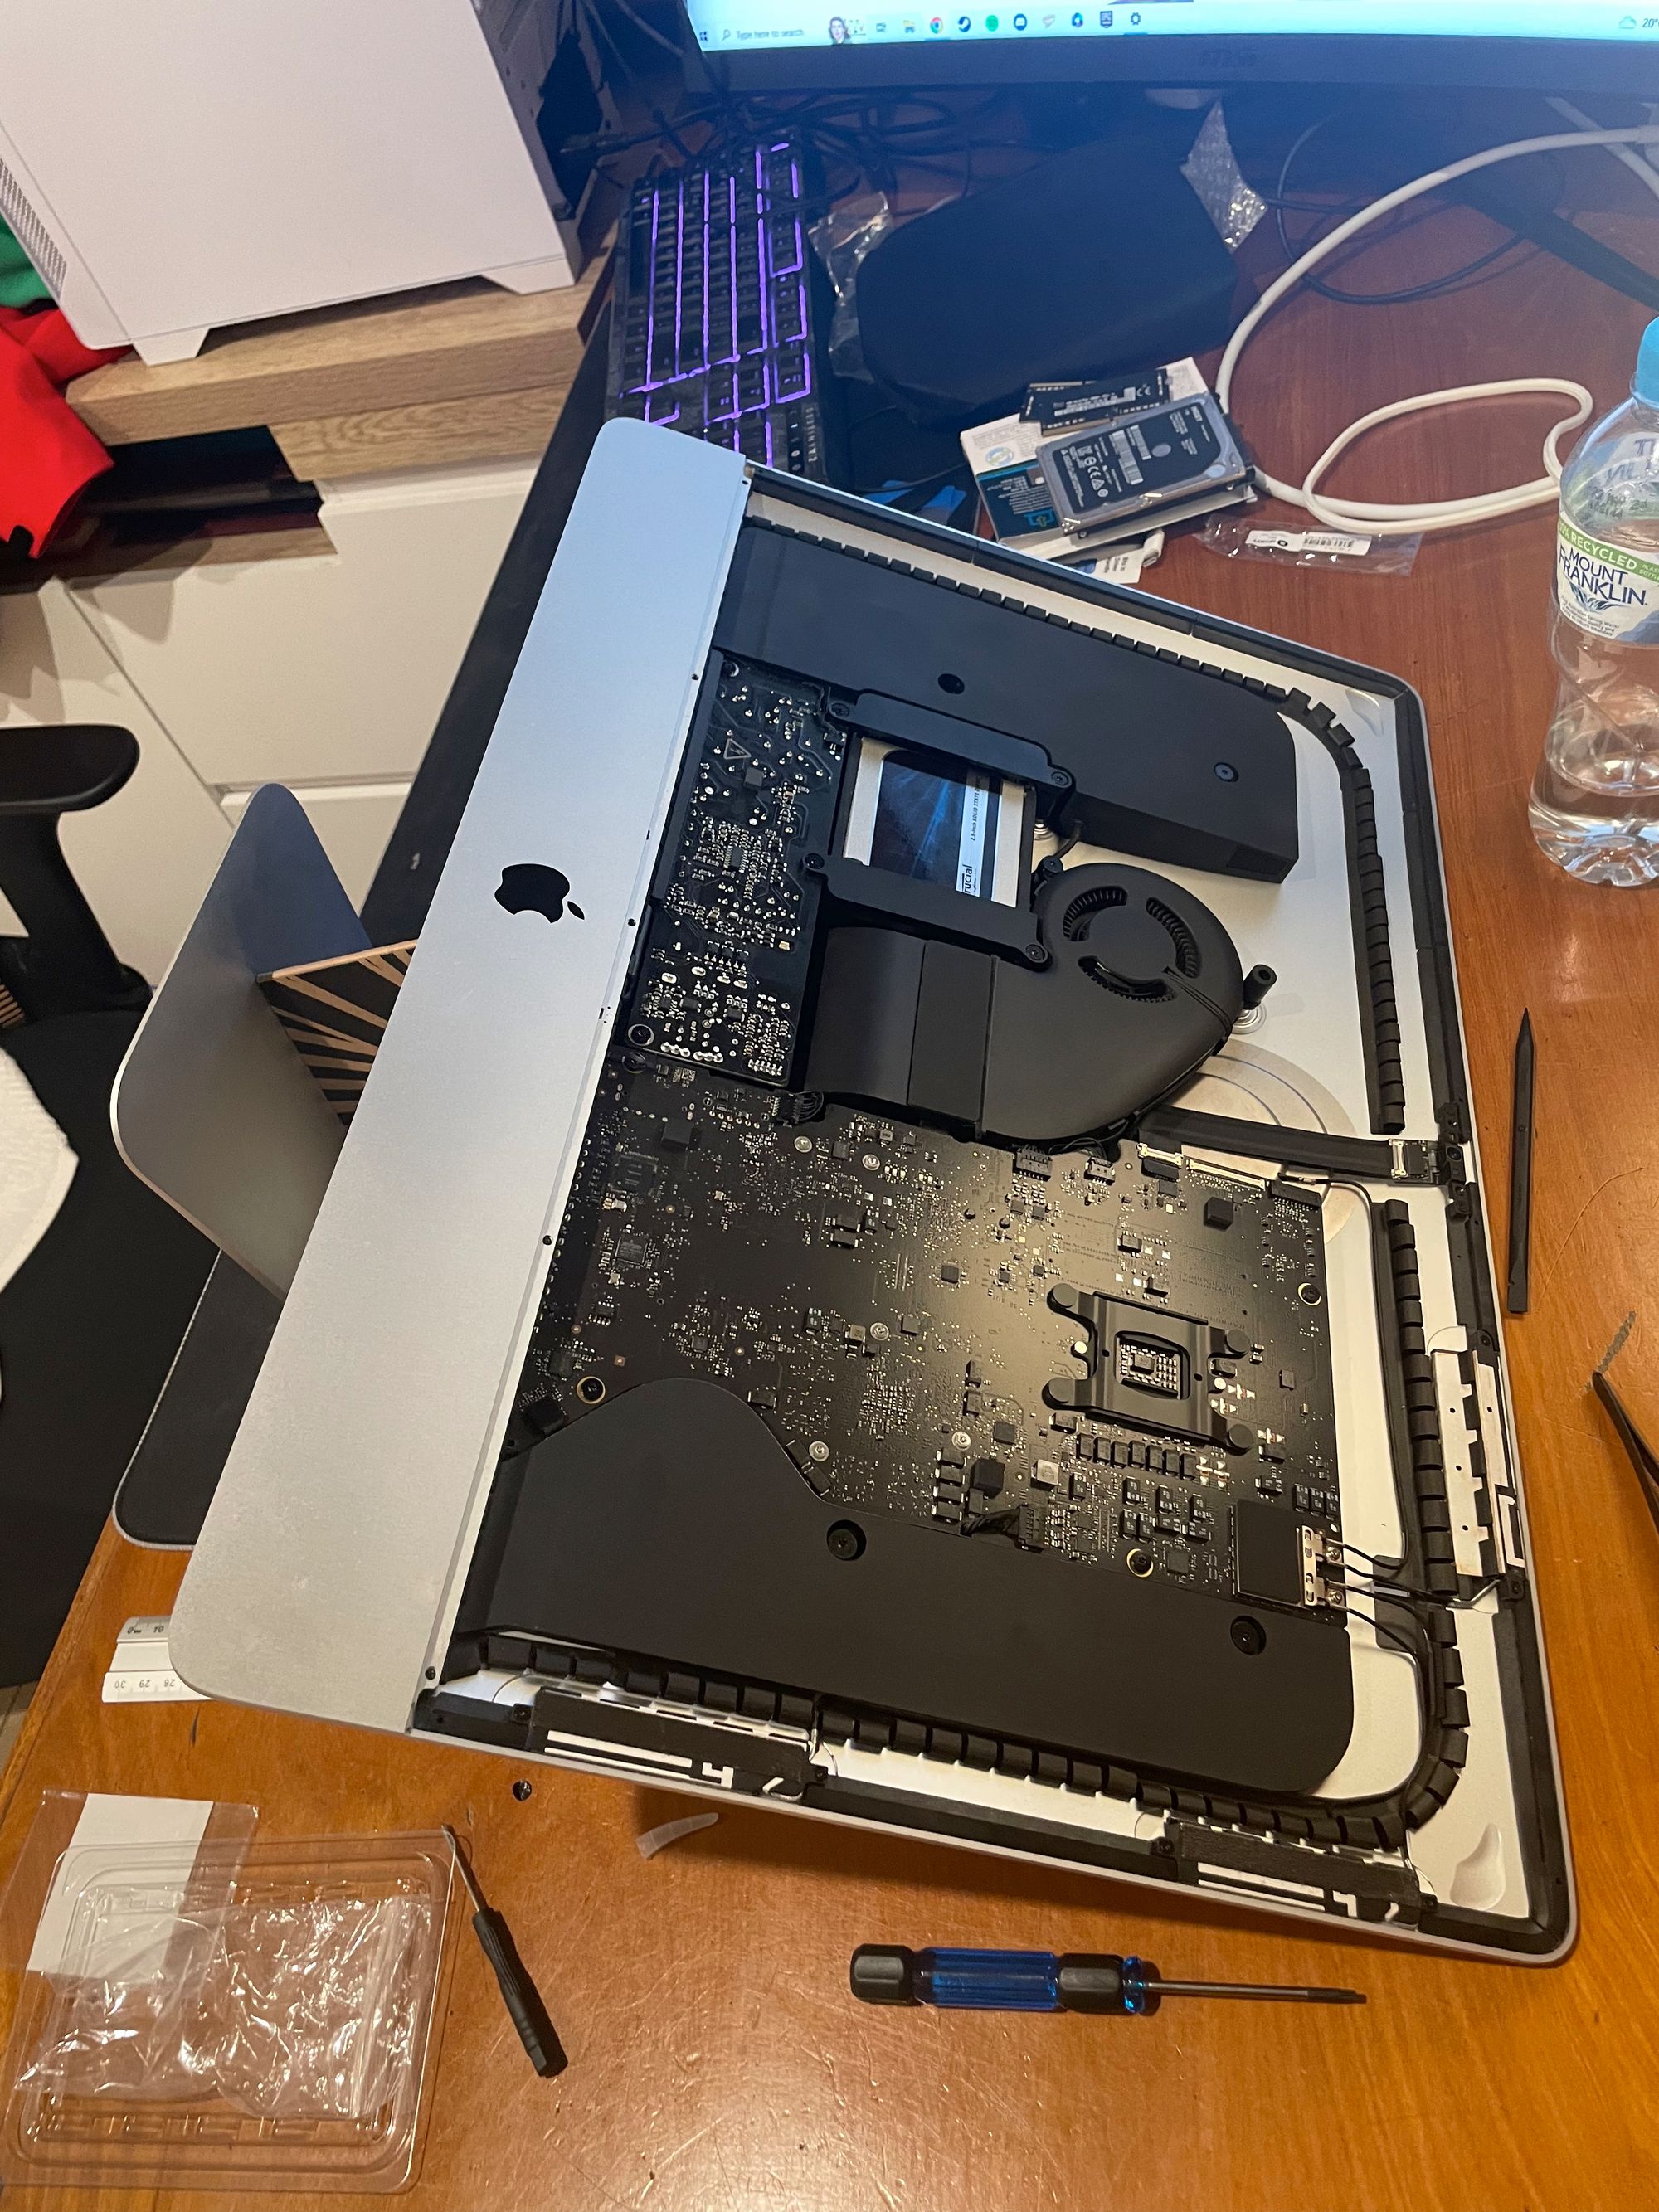
Reassembly took about 2x as long as disassembly, so even though I started just after lunch, I didn’t finish putting it all back together until about 10:30 pm (with maybe 3 hours spent going to the shops, running errands, and having dinner). The new SSD is in the middle, held in by those brackets that also hold down various other components. If only Apple put this much effort into ensuring repairability and upgrade as they do internal efficiency.
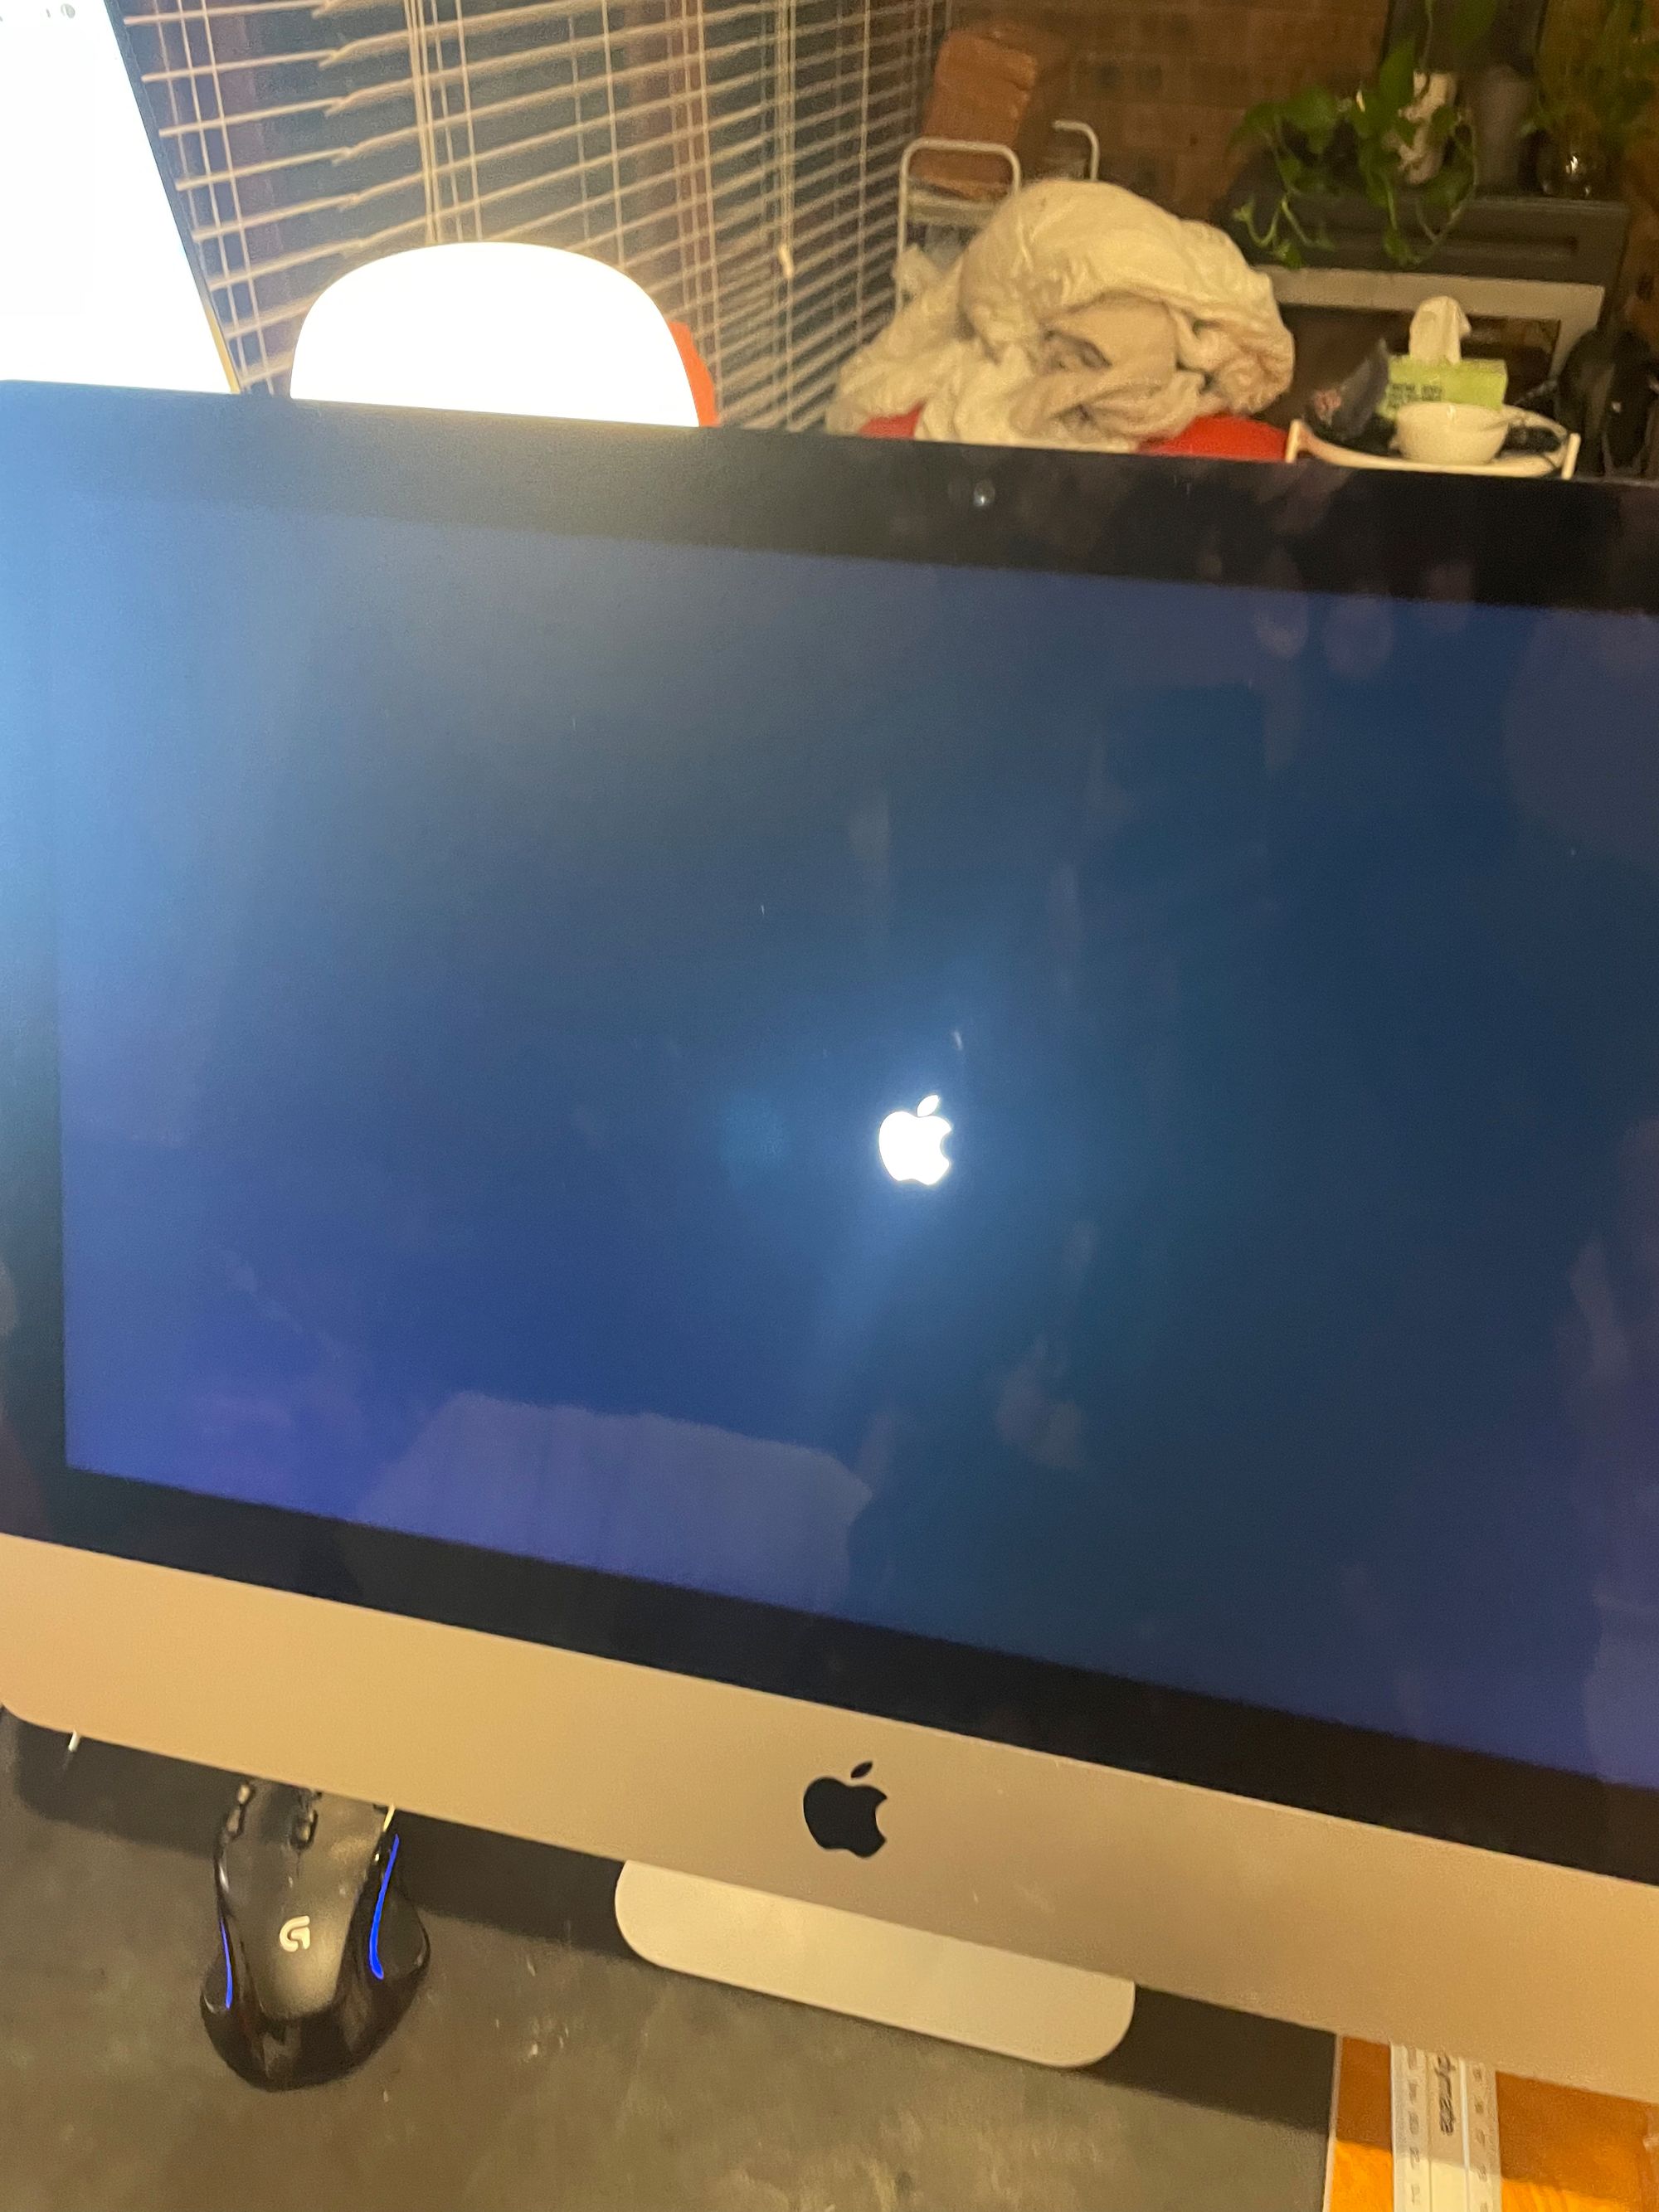
Once it’s back together, you need to test that it boots – so the screen is temporarily reconnected (via a terrifying thin ribbon connector) and gingerly left in place with nothing to secure it (very scary). But it boots! (You can see it now gotten well and truly dark outside)
Now that I knew the upgrade was a success, I had to lay out the new adhesive strips that would hold the screen. I had a spare set, because my RAM also came with some, but even I didn’t want to mess it up after how long it took to clean the old adhesive residue off – cotton sticks, some sticky goo remover and about 45 minutes of abrasive action would have been wasted. They also have to be laid out in a very specific order, as they are shaped to fit the case specifically.
Because the strips are adhesive on both sides, you have to do a tricky manoeuvre where the back side is attached to the case, the screen is lifted into place, the display and webcam cables are reconnected, and then the front side of the adhesive needs to be gingerly separated from its plastic cover without dislodging or peeling it off from where it sits on the case.
Then you can lay the screen down in place and press it down to make a good adhesive contact.
Et voila!
Now to launch into recovery mode and download a new copy of the OS.

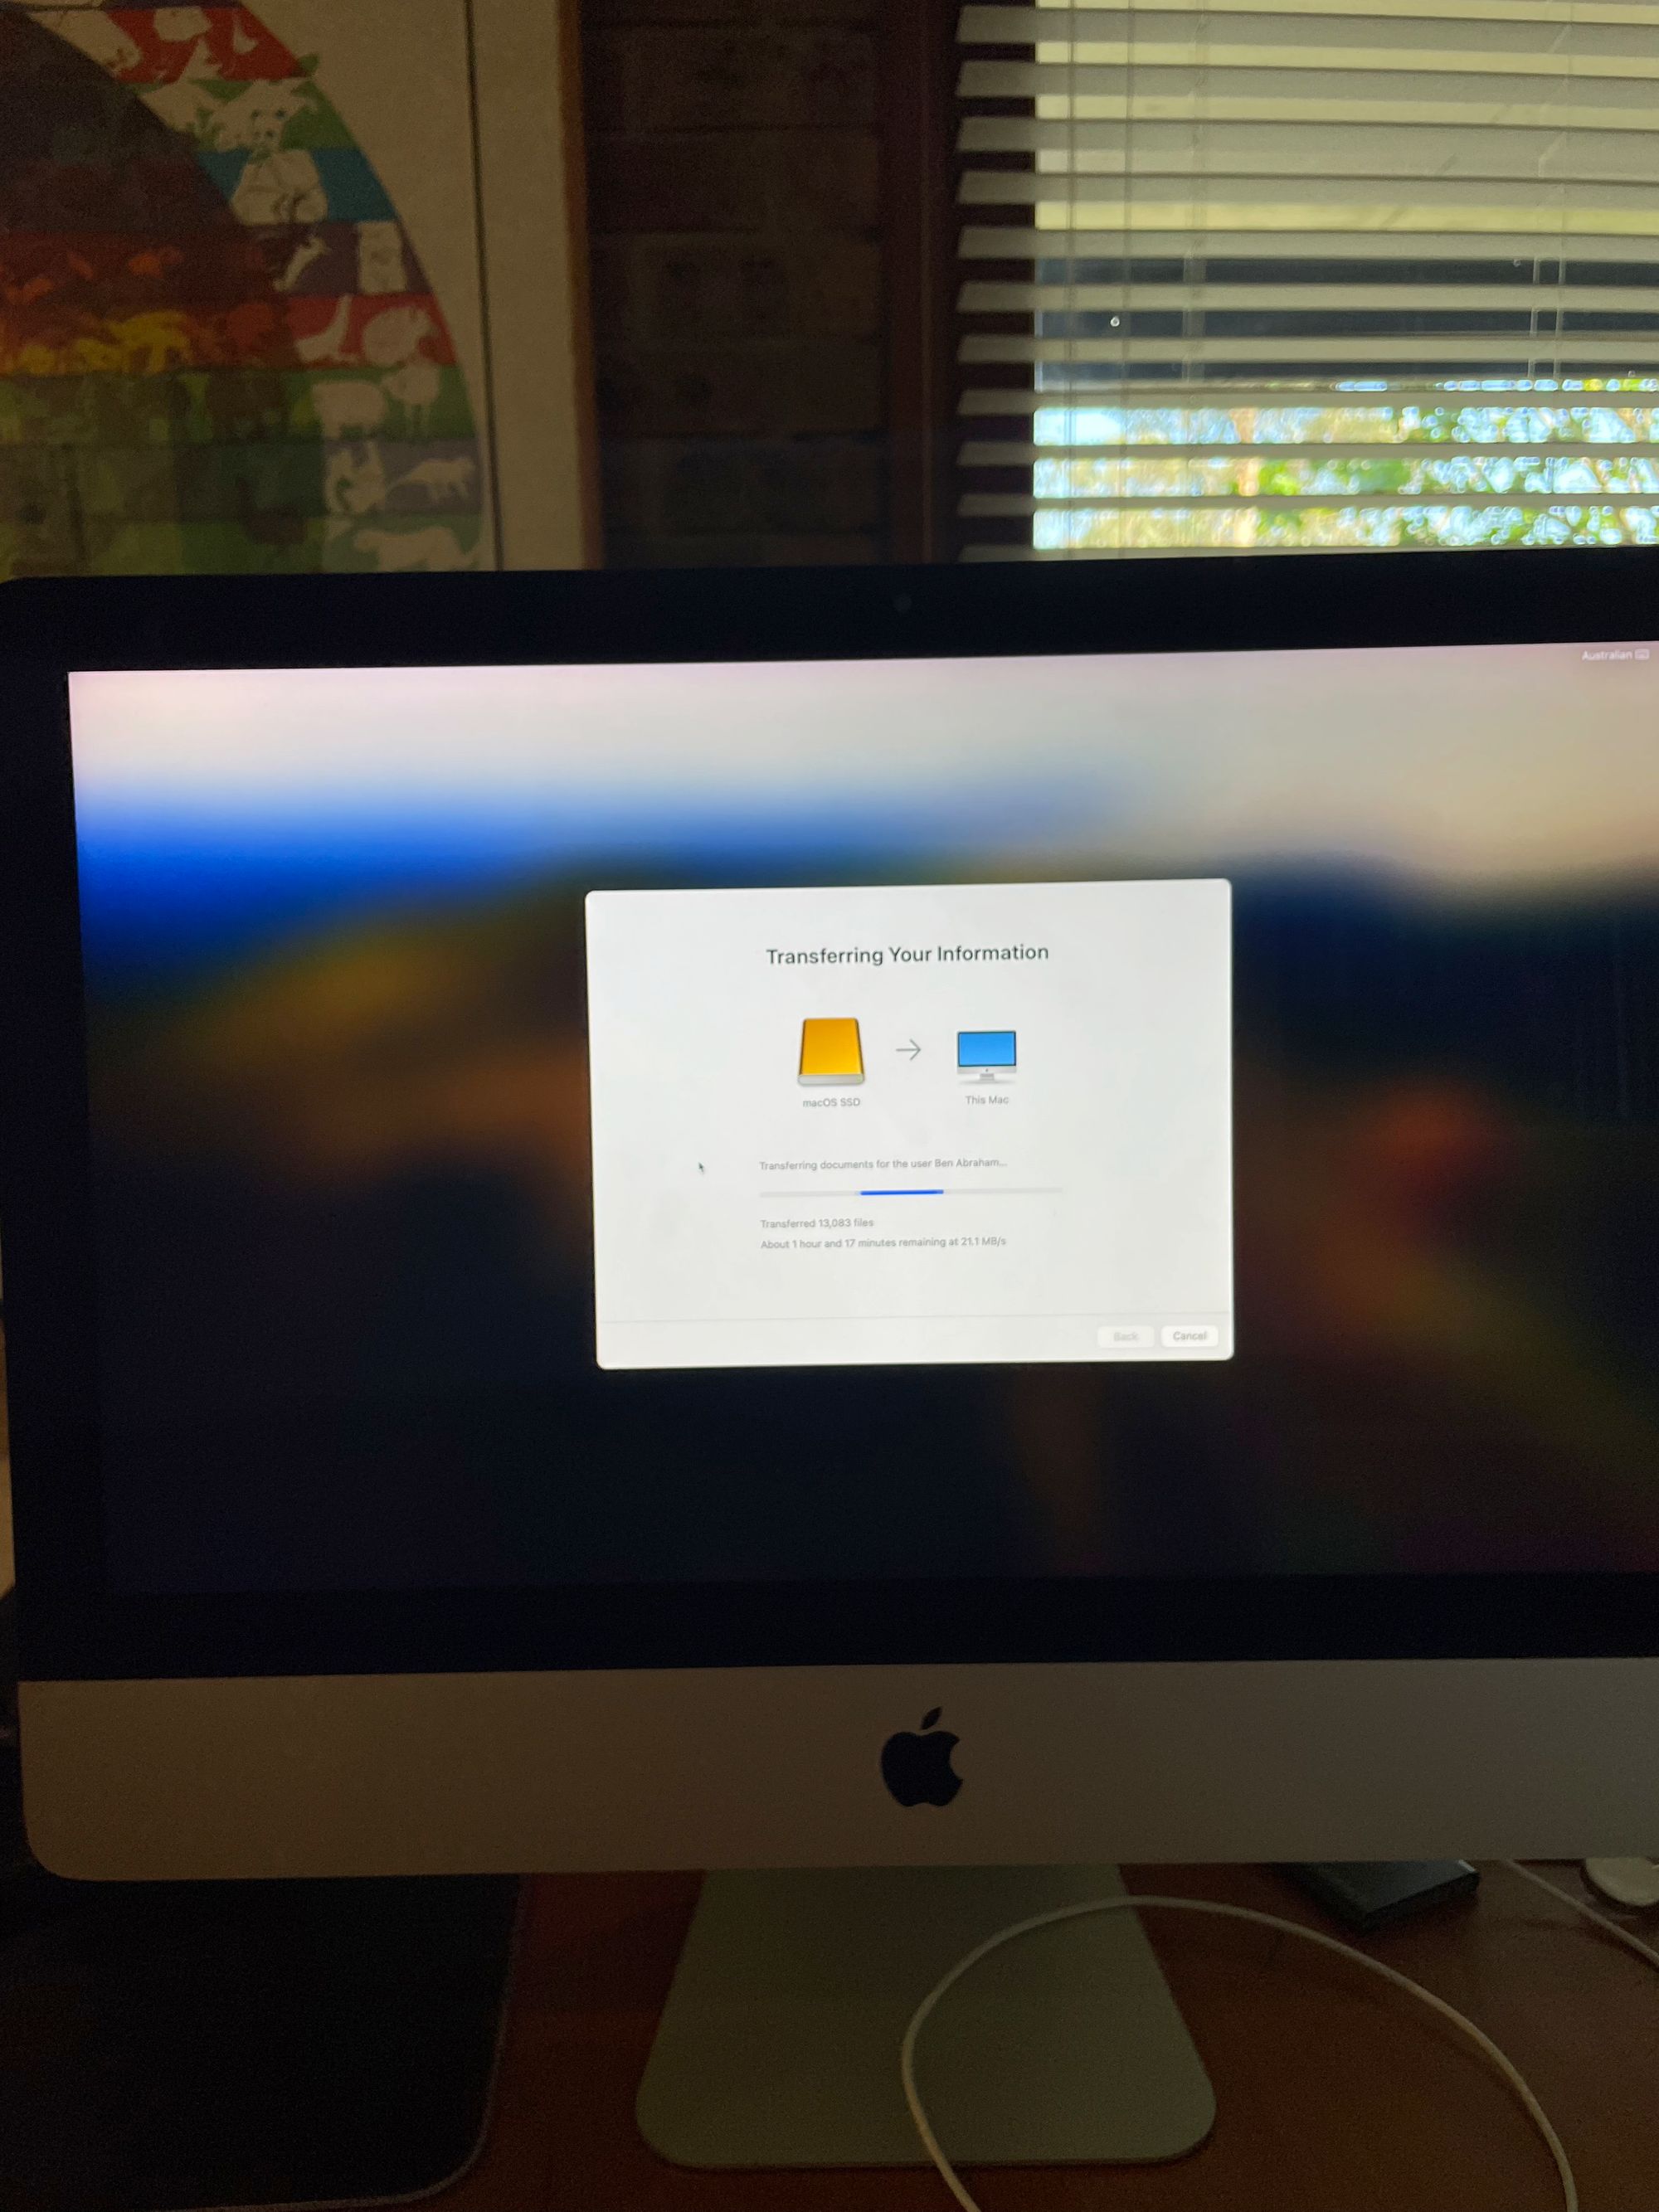
And after about an hour or more of downloading and updating (some of which I left to do overnight) we can load up and start the transfer of files from the old boot drive (on the external SSD) to the new internal boot drive, using the Mac file transfer utility. It’s a very pleasant user experience, I must say.
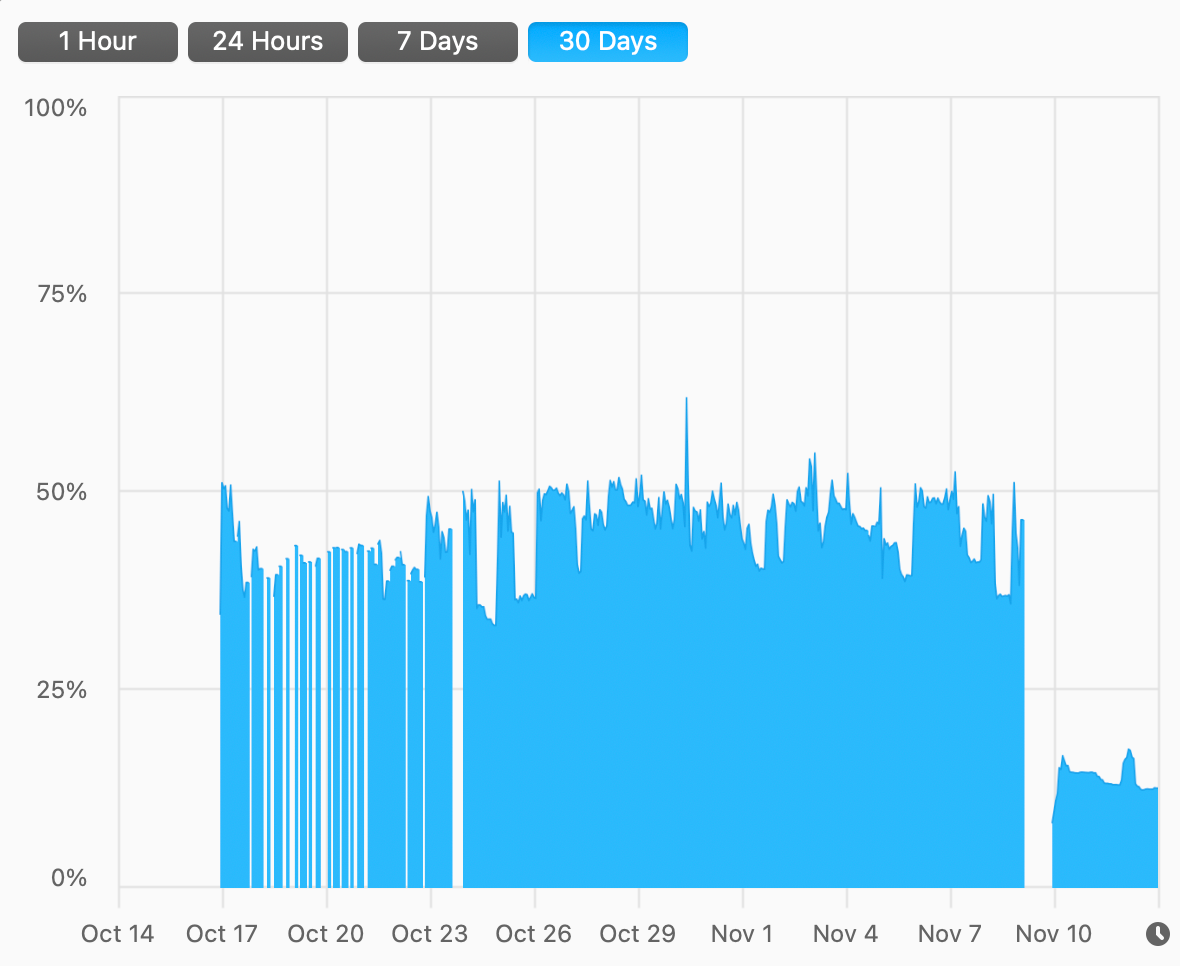
I have a set of hardware monitoring tools called iStatMenus installed to display how my Mac is performing, and previously the “memory pressure” was at or around a constant 50% – it was really working hard. Now, I haven’t seen it go above about 15%. Here’s a chart of the last 30 days – no prizes for guessing when the upgrade occurred.
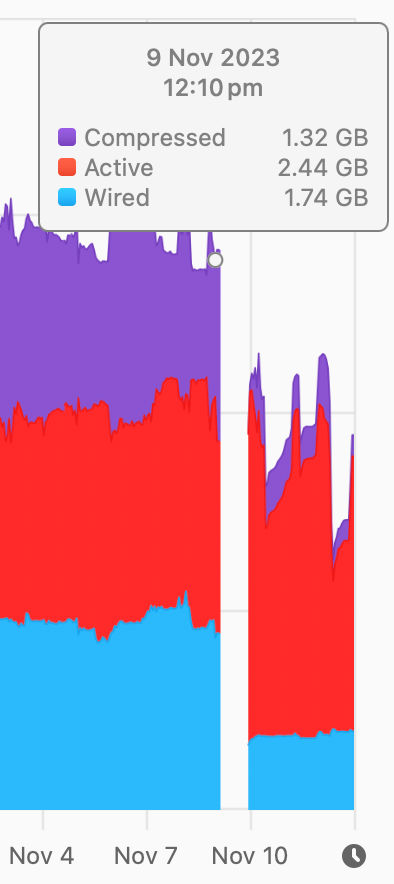
And here’s a graph of the different components of the memory stored in RAM over 30 days. Purple is compressed memory, red is active memory (apps & files), and blue is ‘wired memory’ (core kernel and OS features that basically have to live in RAM).

A closer inspection of the details reveals more about what was happening before and after. On Nov 9th, the day before I upgraded, wired/compressed/active memory looked like this:
And here’s today:
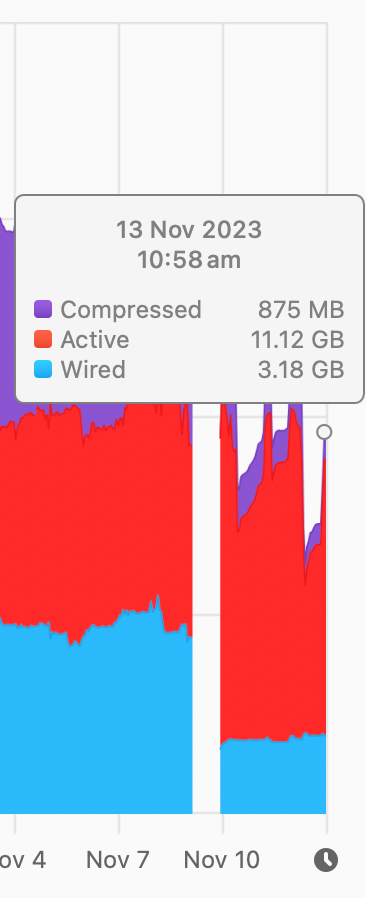
There’s only 800 MB of compressed data stored in RAM now, and the amount of active memory is able to expand to more than the previous total RAM. Notably, wired memory has been able to expand from a tiny 1.7GB to nearly 3.2GB, suggesting that the OS is now able to keep more of its core functions active and ready to go. No wonder it feels more responsive. It no longer has to go digging around on a storage device to find core features, shuffling around things to make space in RAM as needed.
Similarly, the number of active programs I can have open at once without the system slowing to a crawl has exponentially increased. In fact, the entire contents of my Applications folder could now be loaded into RAM and still have room for more (it's only 19 GB). Previously, I could have one, maybe 2 programs open at once without experiencing slowdowns. Now, I can open everything and even leave them open.
But this makes me wonder what it might do to my usage figures – will I end up using my machine in a less power-efficient way? I suspect the differences are marginal. It’s not like 32 GB of RAM uses a heap more power than 8 GB… does it?
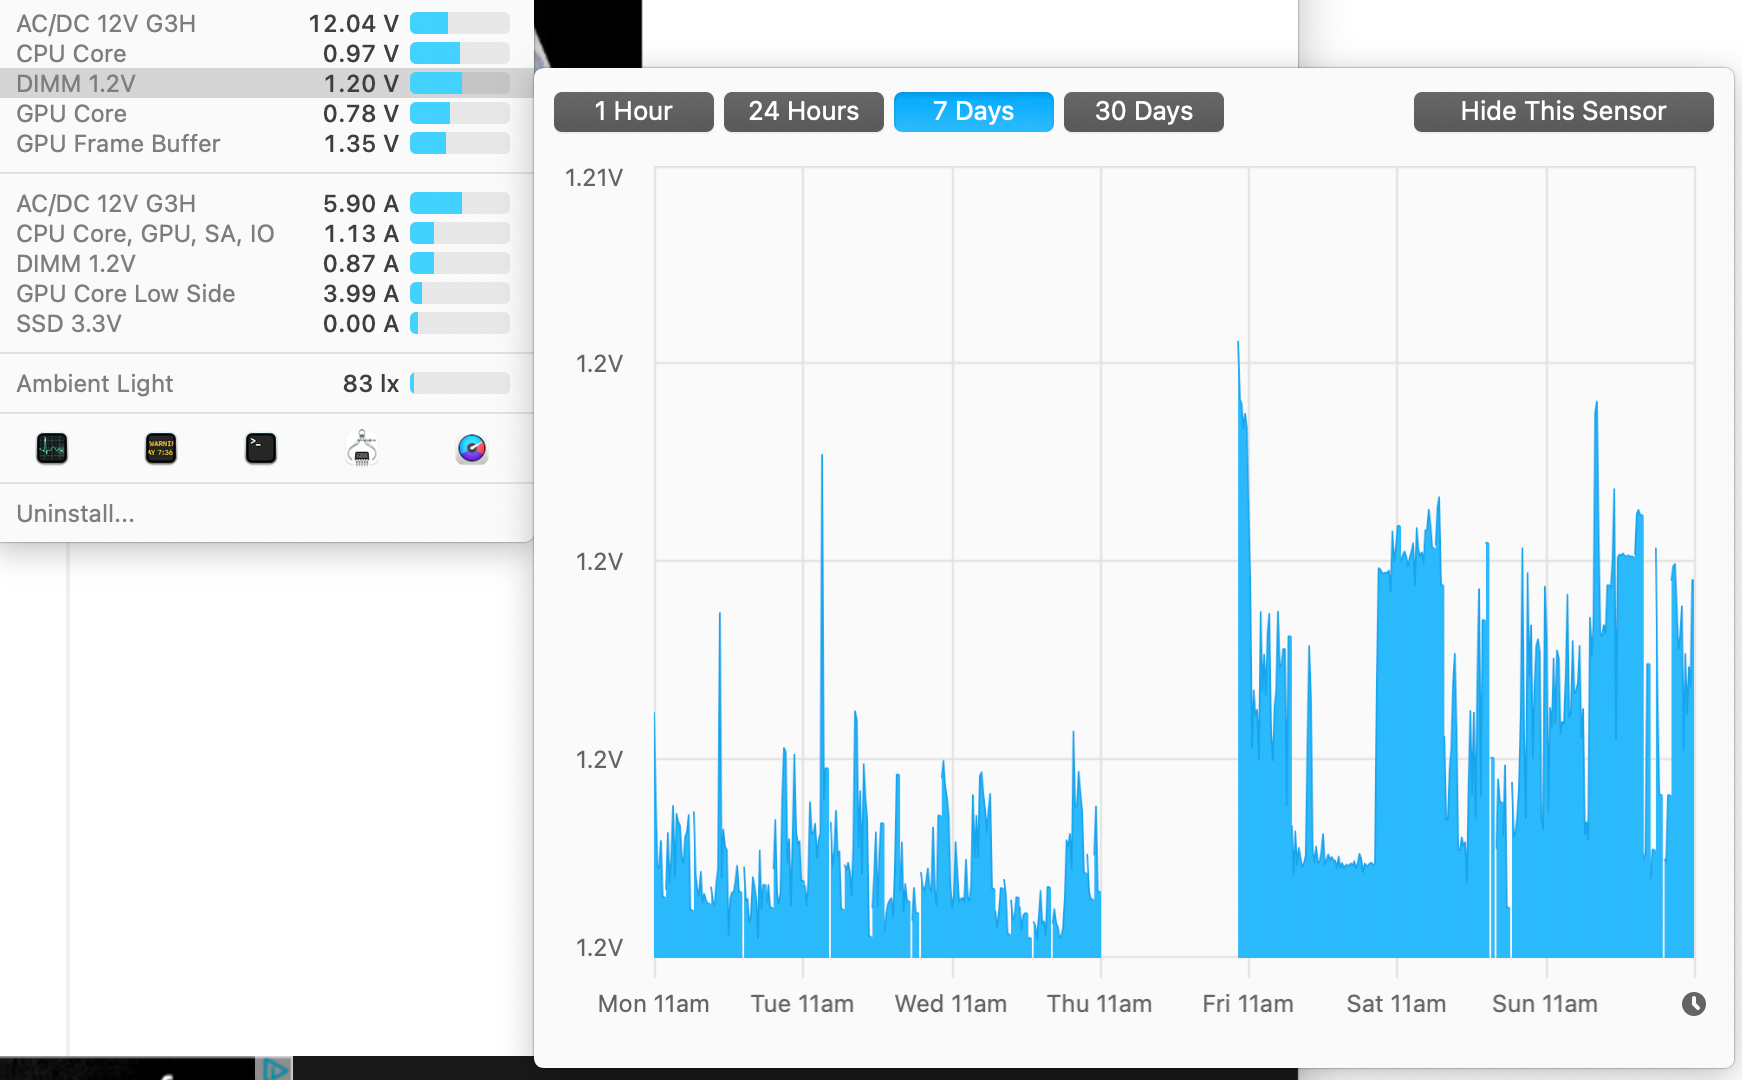
Actually, we can sort of find out. Because Macs are crazy like that, there’s a sensor (or an API reading) that iStatMenus has access to. Here are the last 7 days of RAM DIMM voltage readings. It has gone up after the upgrade, but pay close attention to the left-hand axis… it's not even 0.01 of a volt more. These are tiny increases in voltage, and most likely also total power used.
Unfortunately, without knowing the amps or the resistance of the RAM installed we can’t use Ohm’s law to actually calculate the power directly, but this advice from manufacturer Crucial says that each 8 GB of RAM will probably use about 3 watts of power – but that’s advice for system builders looking to right-size power supplies, and may be more applicable to a 'per DIMM' type of calculation. I'm still using the same number of sticks of RAM, after all, they just happen to fit a lot more memory.
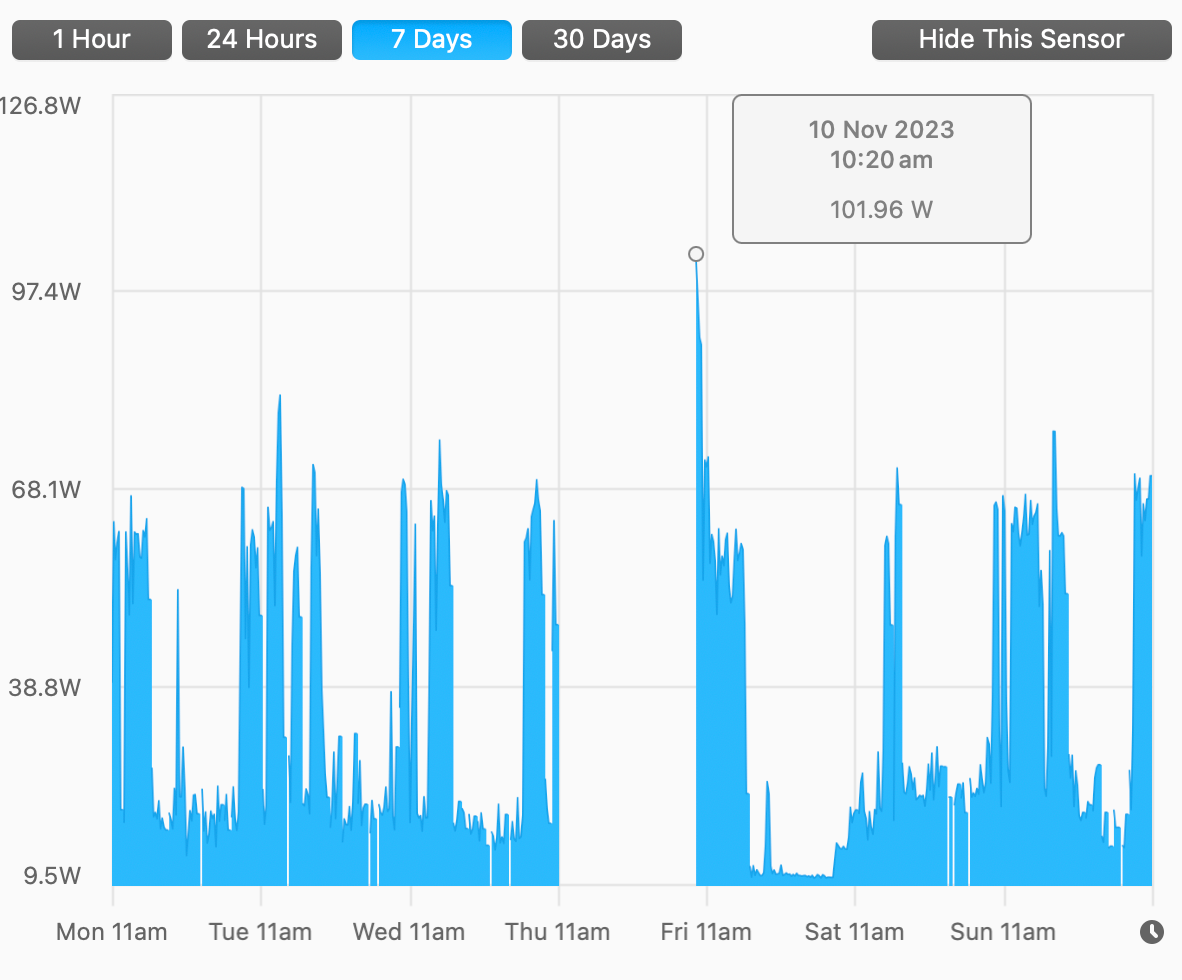
Here’s a direct measurement of 30 days of total system power usage. There’s a spike on Nov 10th, after the upgrade, because there was a lot happening with installations, updates, and rebuilding the Spotlight index in particular. But after that… it’s actually not substantially different to before. The same sorts of peaks – maybe a little bit higher lower baseline?
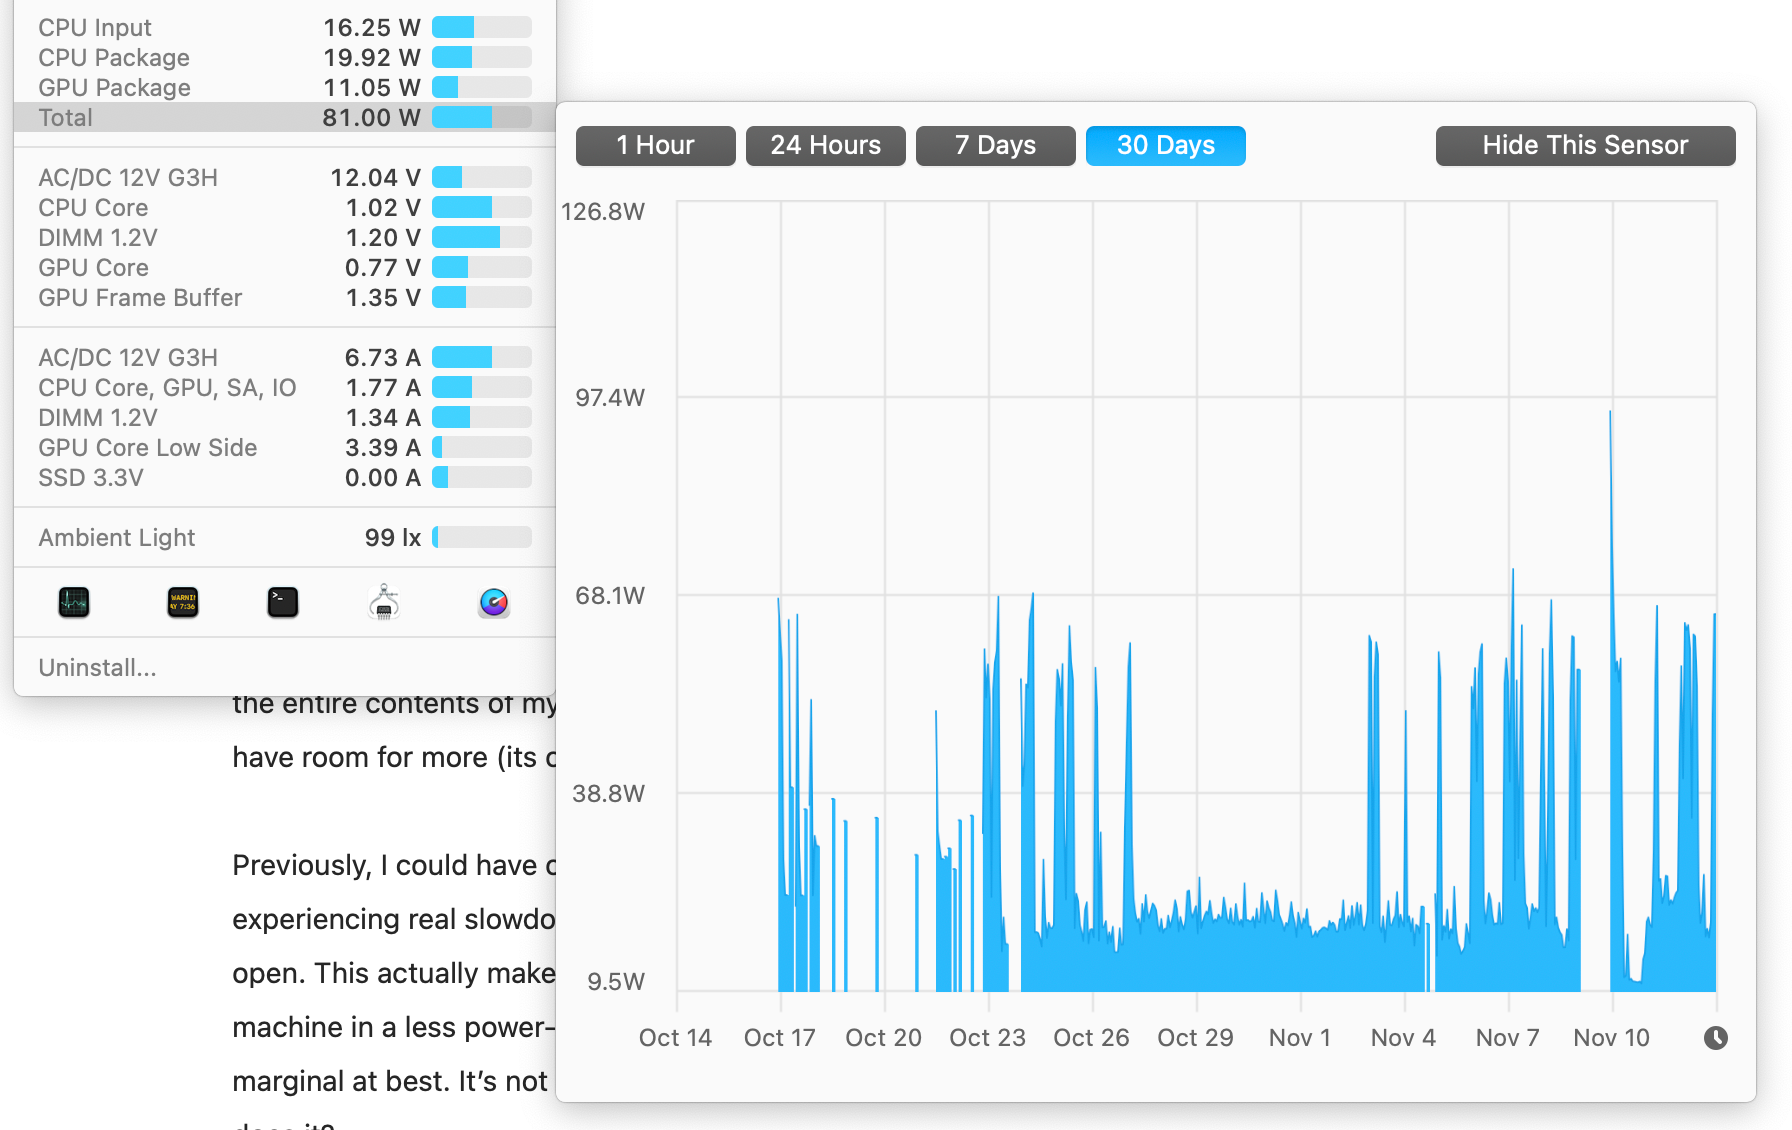
Here’s the same graph just showing the past 7 days – that peak of 100 watts was nice and short. Otherwise, it seems basically no different. Swapping out a HDD for an SSD with no moving parts might also have saved some power as well. Perhaps that’s enough to offset the RAM increase… hard to say for certain.
There’s one last factor that I consider for how it might affect whether the upgrade increases (or decreases) my device’s energy consumption – that’s what it does to my usage patterns.
On the one hand, I might be tempted to do more taxing tasks – load more Excel sheets, perform more complex graphing and visualisation tasks I couldn’t really do before, and so on. On the other hand, it might let me get my work done faster because I’m no longer waiting for the system to catch up 5 minutes out of every hour. So far, I suspect that the baseline is higher because I'm simply using the device more.
But at this stage, it's too early to say – it will come down to how my real-world usage interfaces with the changes I’ve made, and that is as much down to future accidents of fortune and planning as anything hardware related.
Overall this upgrade was a great success. The 32GB of RAM I bought cost $189.89 AUD including shipping, and the iFixit SSD replacement kit cost $239.58 AUD, plus the extra $30 for screwdrivers, for a total of $459.47 – or about $292 USD. The computer (which I’m writing this very post on) is now much more snappy and hopefully can last me another 4+ years – far longer than Apple’s “conservative” estimate. At a cost of $100 per year, I reckon that’s a bargain, both for me and for the planet, preventing the early retirement of the approximately 282 kg of CO2 embedded in the device and unnecessary early recycling. Basically $1 for every kg of CO2 saved, plus I get a better device. A bargain at twice the price.
If you’re interested in doing your own upgrades or repairs – I cannot recommend iFixit highly enough. Their guides are superb and every time I’ve had any interaction with the organisation I’ve come away just super enthused.
Did you know they permitted me to use an image of the PS4 teardown in Digital Games After Climate Change? No questions asked, just “yep, go for it”. Incredible.
Repair truly is noble.